SillyTavern
In this guide, I'll cover the process which I used to download and install all the necessary requirements to run SillyTavern on Arch Linux.
If you have a moderately powerful PC and an NVIDIA GPU, then, by the end of this guide, you will be able to use your microphone to do voice chat with an AI character, then have them respond back with a lifelike voice of their own. You can go on virtual adventures together and even have more than one AI character active, so they can not only talk to you - but with each other!
There is a lot to cover to get this set up. Therefore, I'll avoid my usual lengthy explanations and try my best to make this as easy to follow as I can.
Step. 1: text-generation-webui
Clone the textgeneration-webui to your $HOME folder.
1git clone https://github.com/oobabooga/text-generation-webui.git
2cd text-generation-webui/
Ensure to append the --api flag every time you run the start script. Without this, SillyTavern won't be able to connect to the text-generation-webui API:
1./start_linux.sh --api
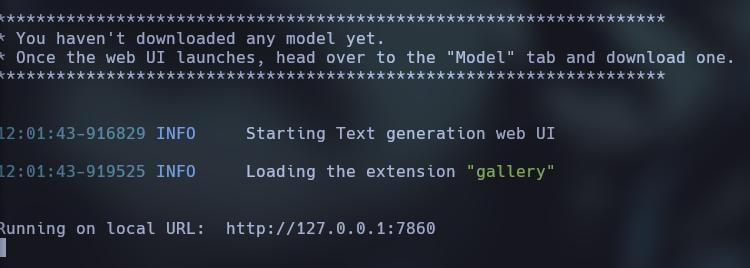
Follow the steps shown in your terminal for the text-generation-webui script. Select your GPU option, then, after all the dependencies have been installed - open the URL shown in the terminal to launch the UI in your browser.
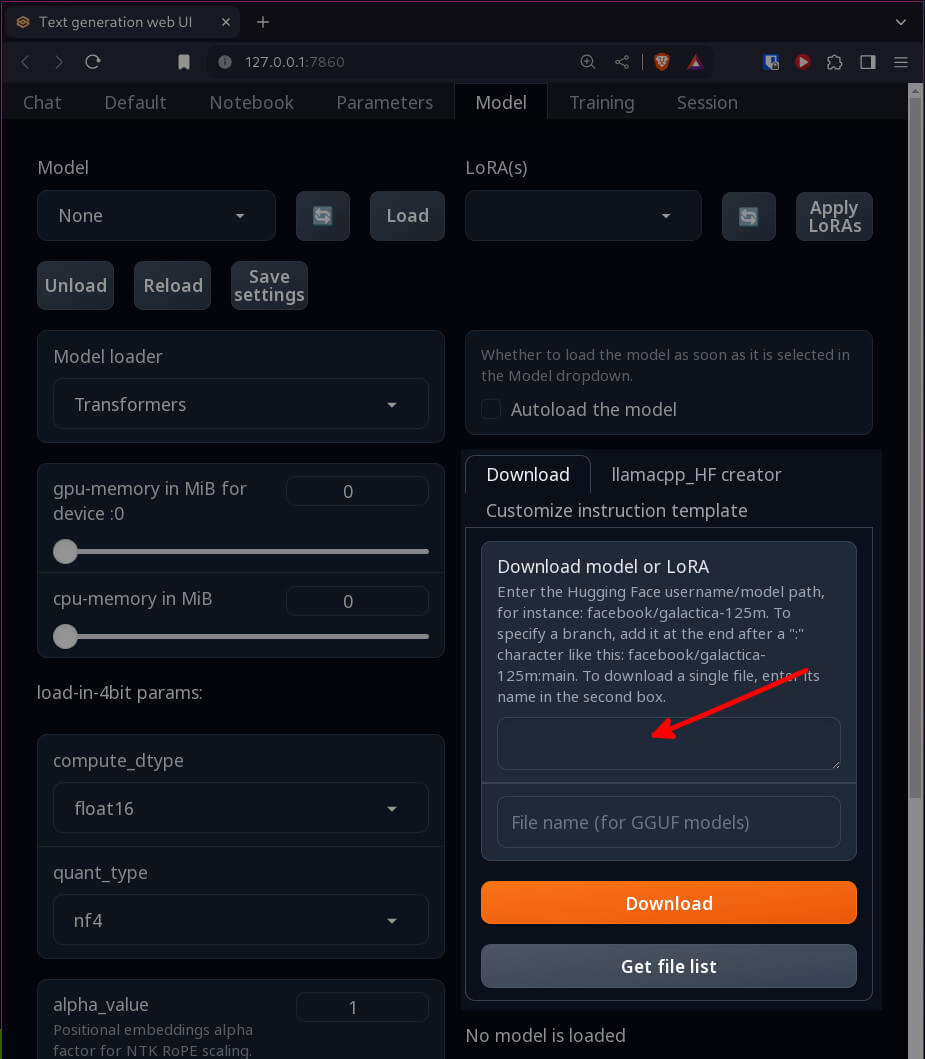
Model Tab
Navigate to the "Model" tab.
You can see in the image below, that there is a "Download model or LoRA" field, which you can use to enter the name of the AI model you wish to download.
Navigate to this HuggingFace URL: https://huggingface.co/Lewdiculous/BuRP_7B-GGUF-IQ-Imatrix
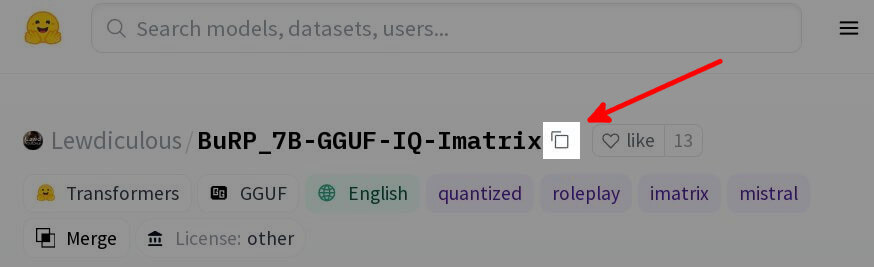
Left-click on the copy URL button and paste (Ctrl v) the name into the text-generation-webui page "Download" field.
Then press the "Get file list" button:
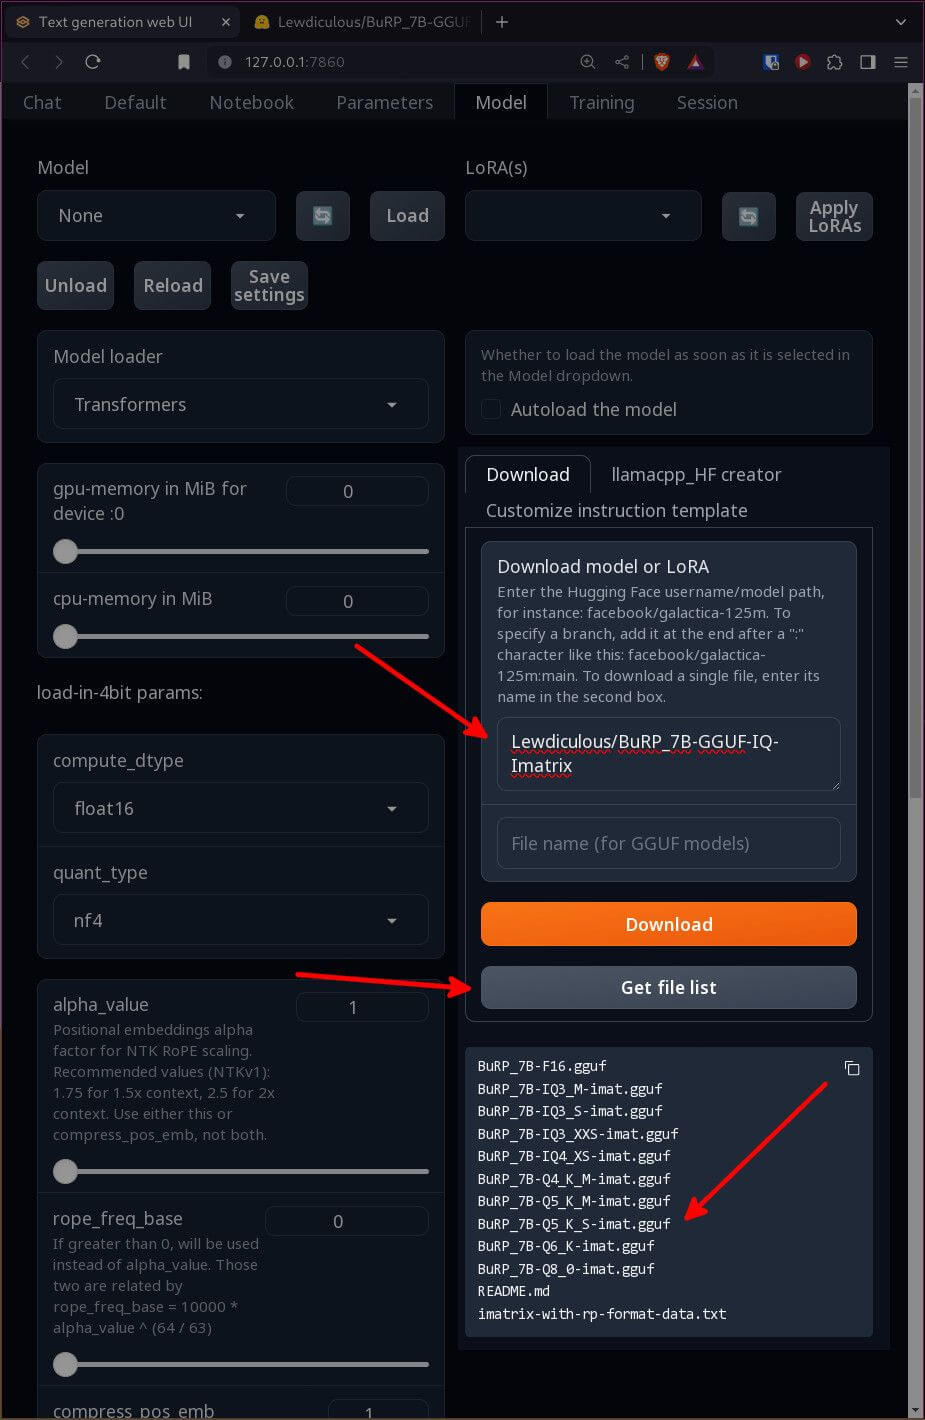
You will see a bunch of different model names listed. You only need to choose one. So, copy the name of the one you wish to use into the "File name (for GGUF model)" field. I used the "BuRP_7B-Q5_K_S-imat.gguf" for this example:
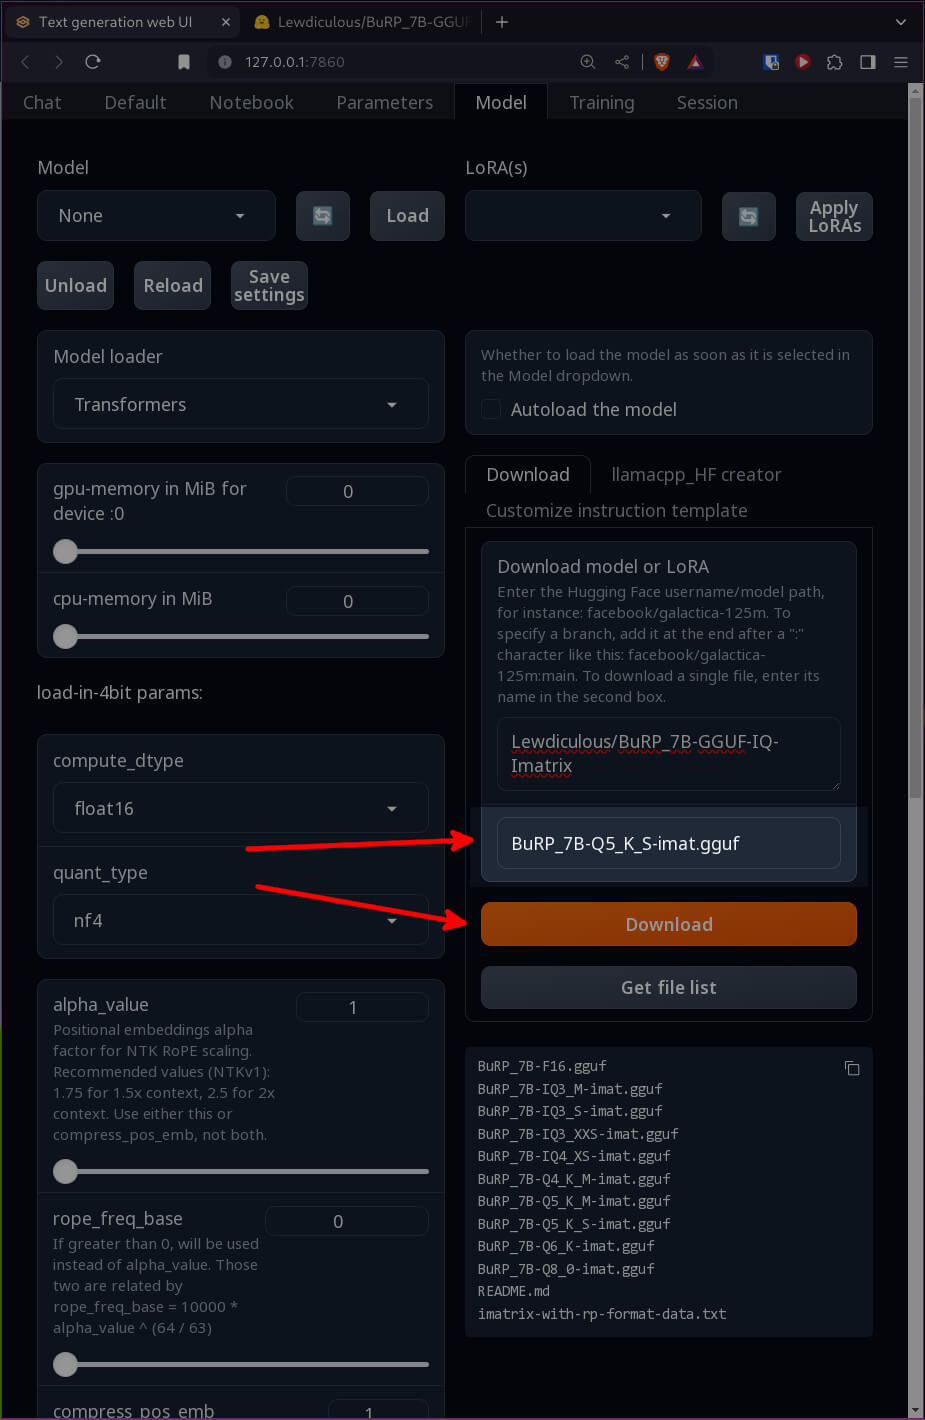
then, press the Download button.
The model will be about 5GB in size, so ensure you have enough free disk space for it.
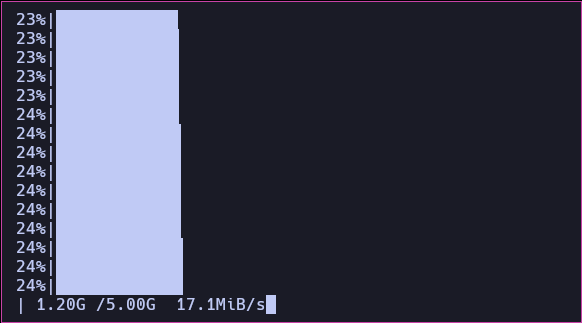
Be patient, and wait for the model to download. You can view the download progress in your terminal which you used to launch the text-generation-webui:
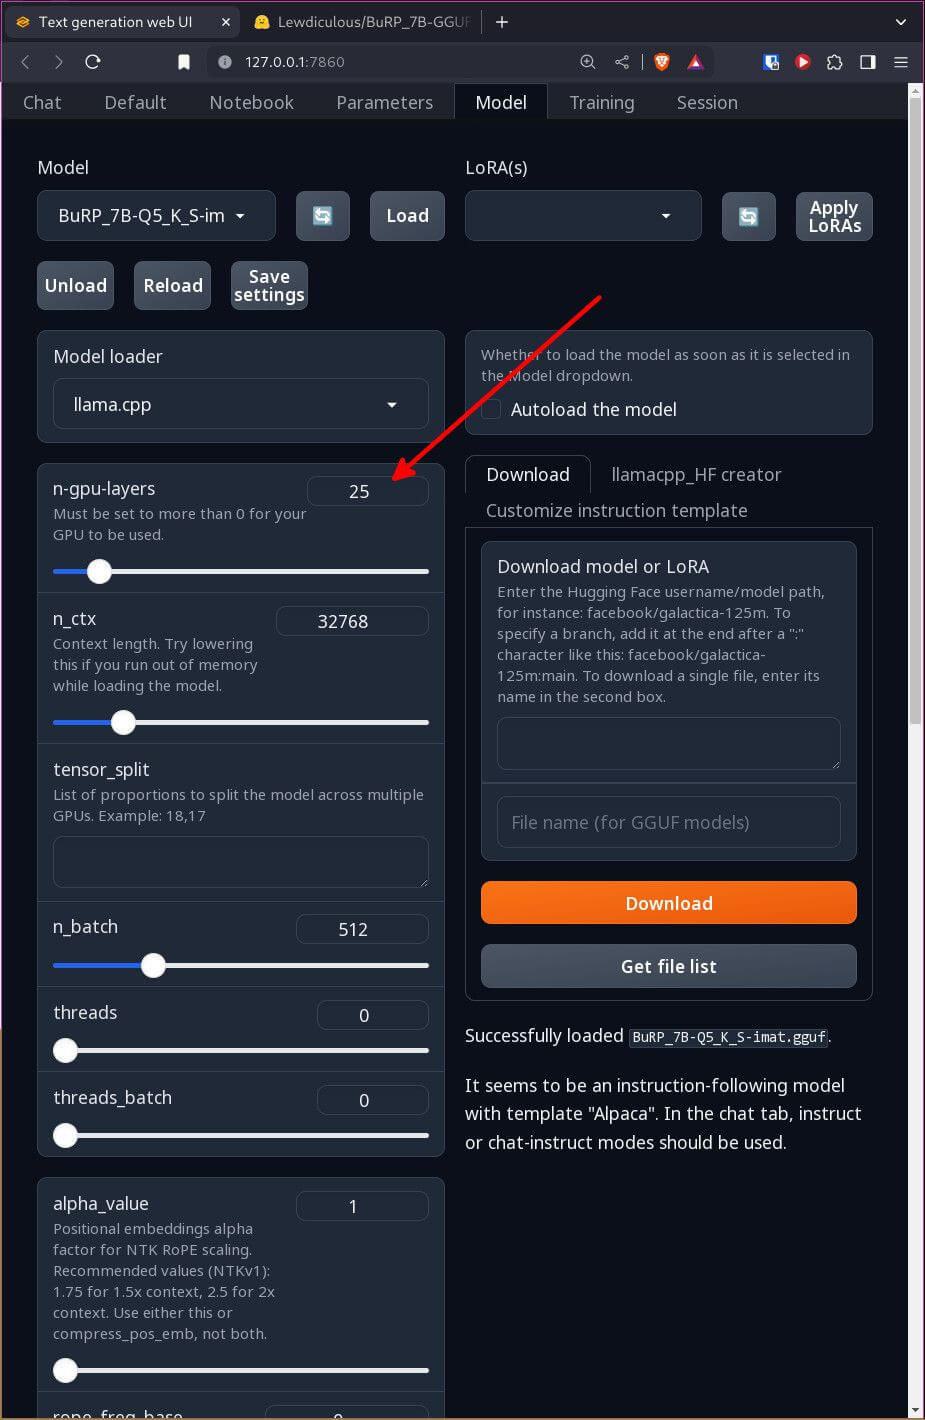
Once the model has been downloaded - press the refresh button under the model heading. You will see its name in the drop down list for you to select it.
Before pressing the Load button - I set the n-gpu-layers slider to 25 (since I have a RTX 4070). This offloads some of AI workload to the GPU.
Session Tab
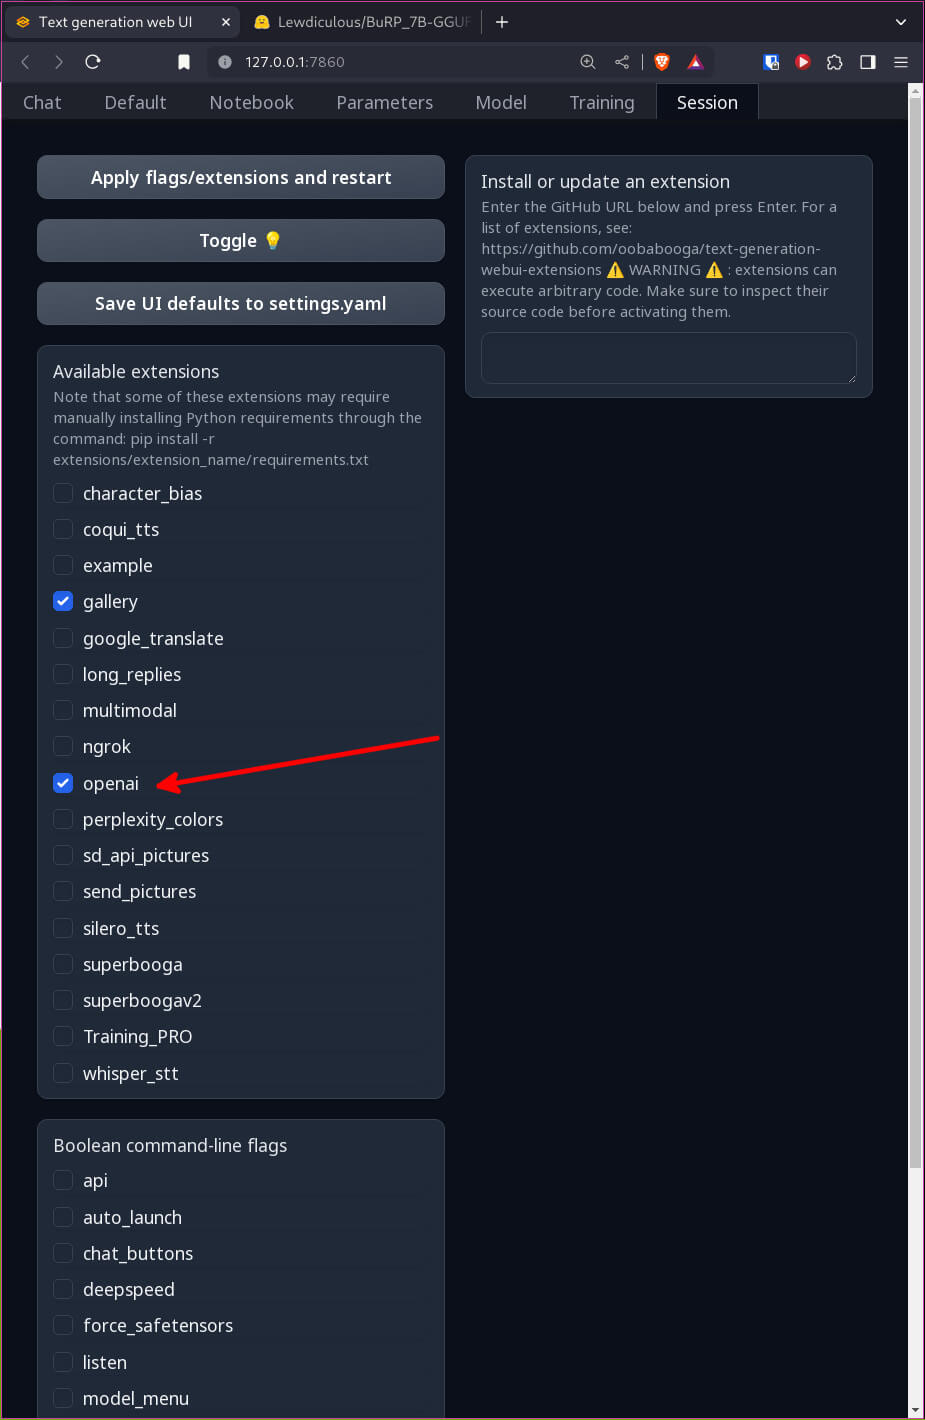
Click on the Session tab, and ensure that the "opanai" button in the Available extensions' table is ticked.
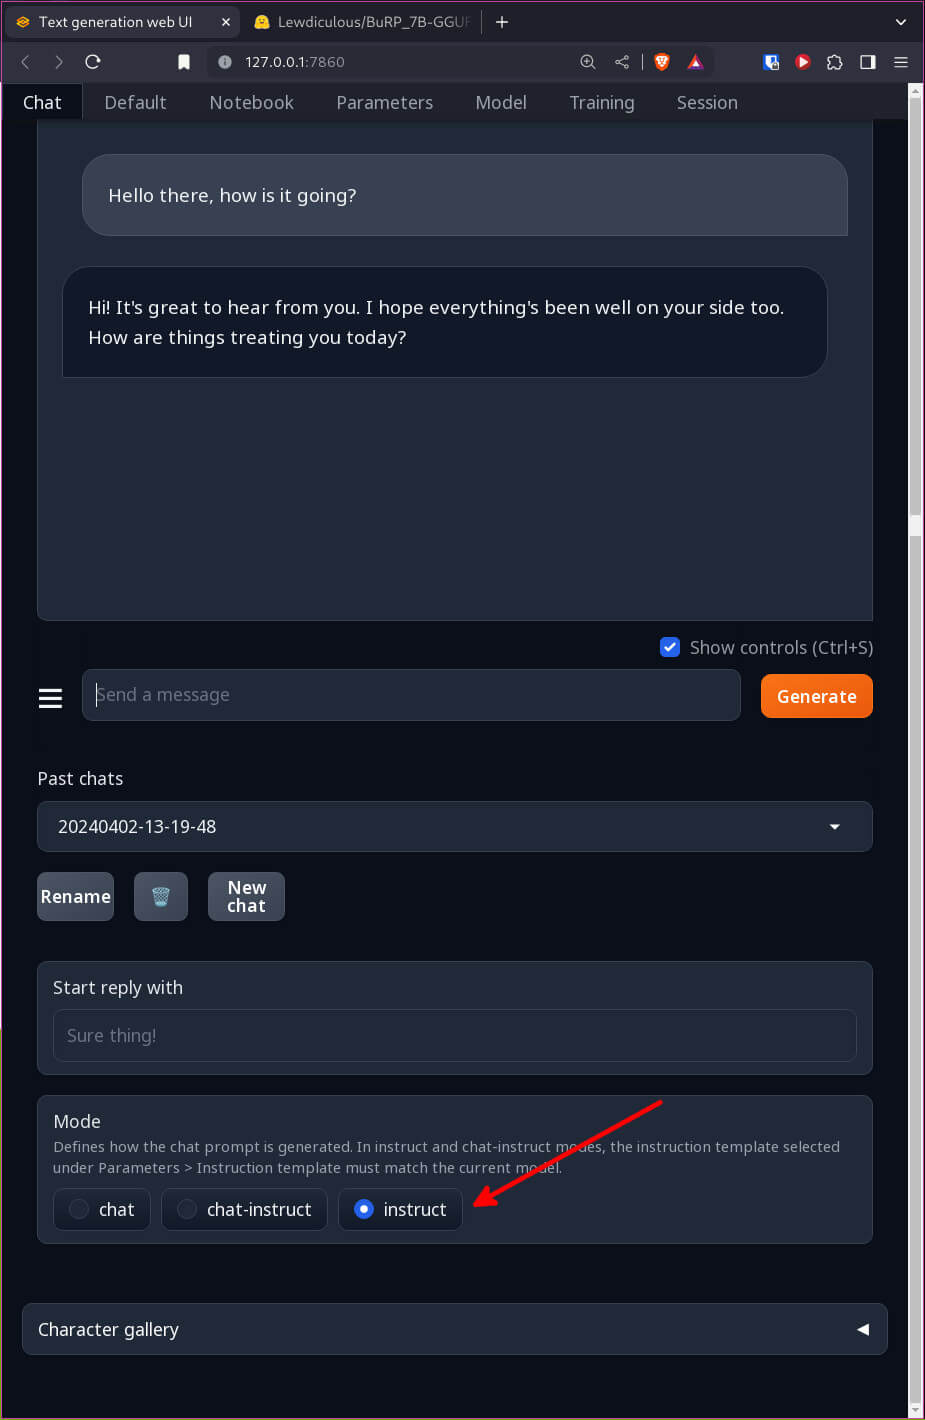
Chat Tab
Navigate to the Chat tab and select the "Instruct" mode button. Then, enter a small message into the chat entry field to test that the bot is able to respond to you and that the model has loaded correctly:
If everything is working as intended, then this is all we have to do for this step.
Step. 2: SillyTavern
Next, we are going to download and install the SillyTavern chat interface. This will use the AI chat model which you have loaded in oobabooga/text-generation-webui to create a more interactive chat experience for your AI roleplay sessions. Both the text-generation-webui and SillyTavern need to be loaded together each time you wish to use these locally on your PC.
First check that you have Node.js v18 installed:
1node -v
If you don't have this, you can install it by opening another terminal and entering:
1sudo pacman -S nodejs
Downloading SillyTavern
In a new terminal window, enter:
1git clone https://github.com/SillyTavern/SillyTavern.git
2cd SillyTavern
Now we have SillyTavern downloaded, let's run the UI:
1./start.sh
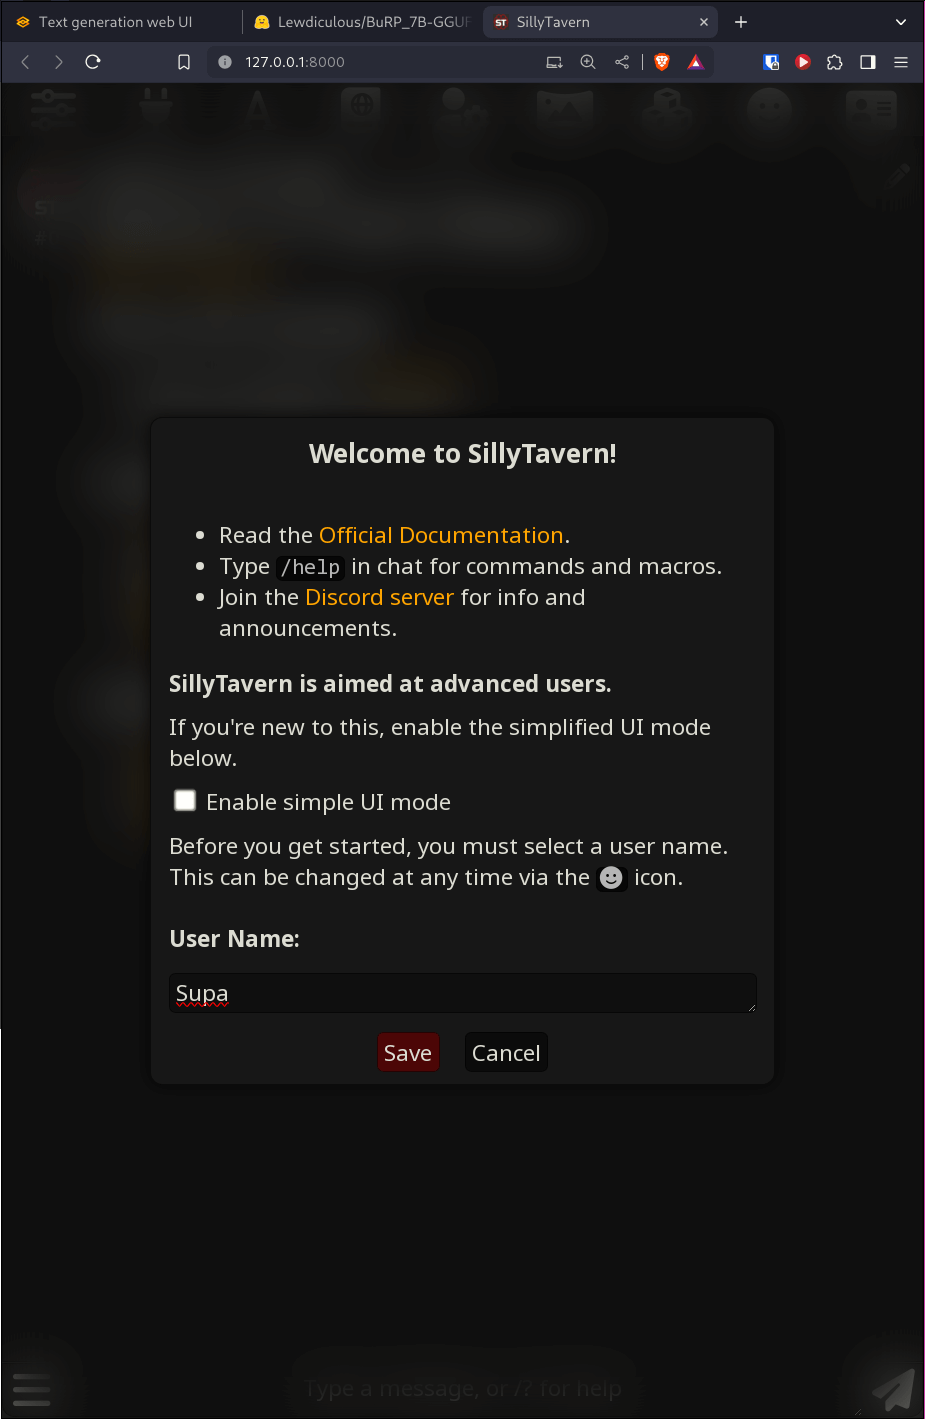
SillyTavern will now launch and present itself in a new tab in your browser. Enter a name for yourself and press the Save button to continue:
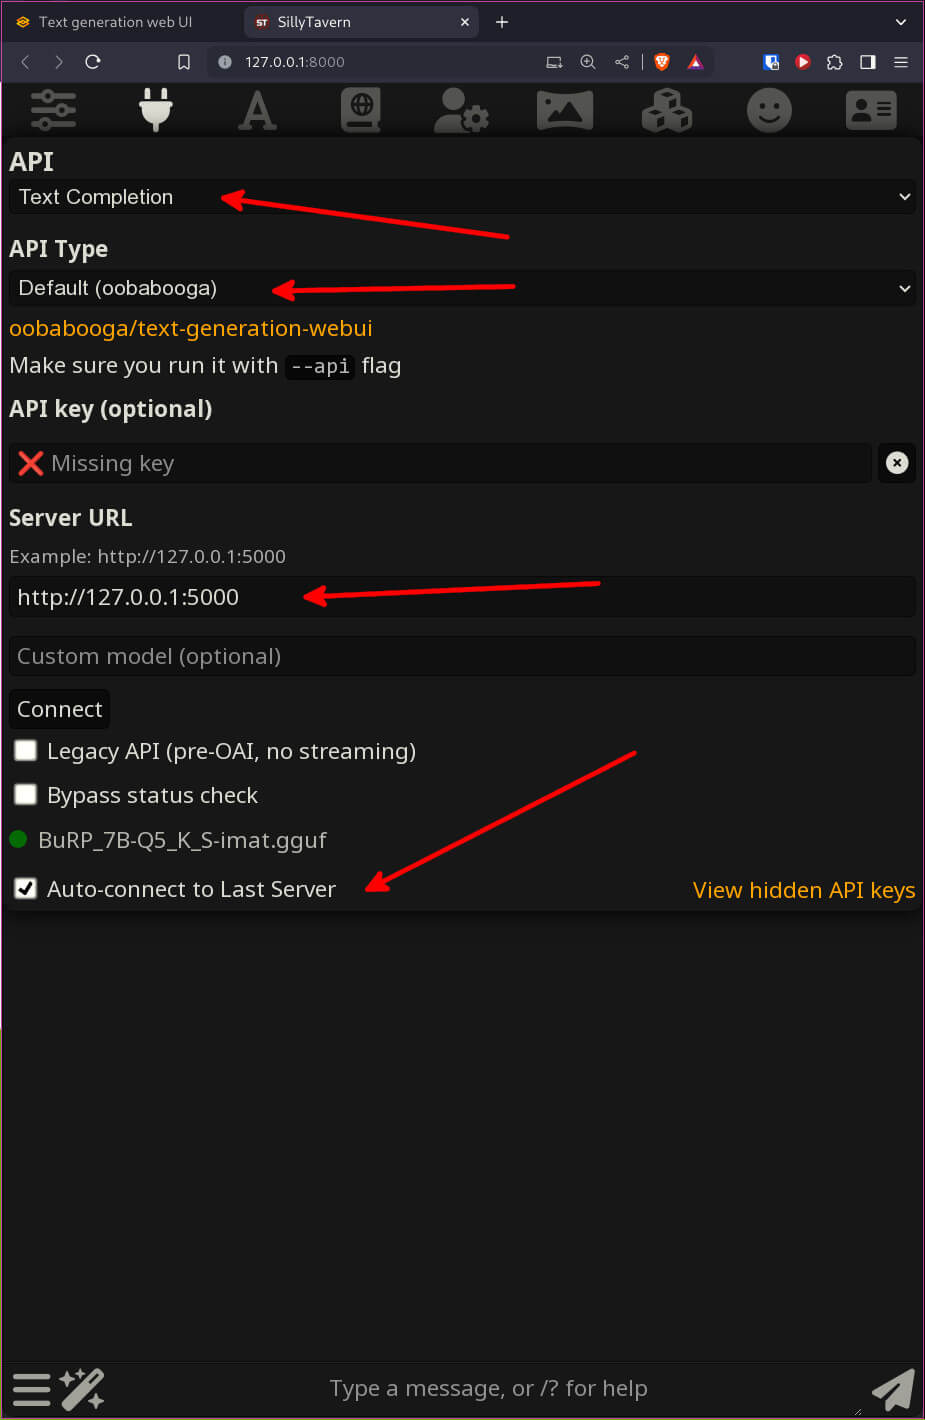
Next, left-click on the red plug socket icon on the top of the window and enter the URL for the text-generation-weui API.
Select from the drop-down menu:
- API = Text Completion
- API Type = Default (oobabooga)
- API Key (optional) = Leave blank
- Server URL =
http://127.0.0.1:5000
Click the Connect and the Auto-connect to Last Server button.
You should now see that it has connected to the text-generation-webui API and the name of the AI model is also shown.
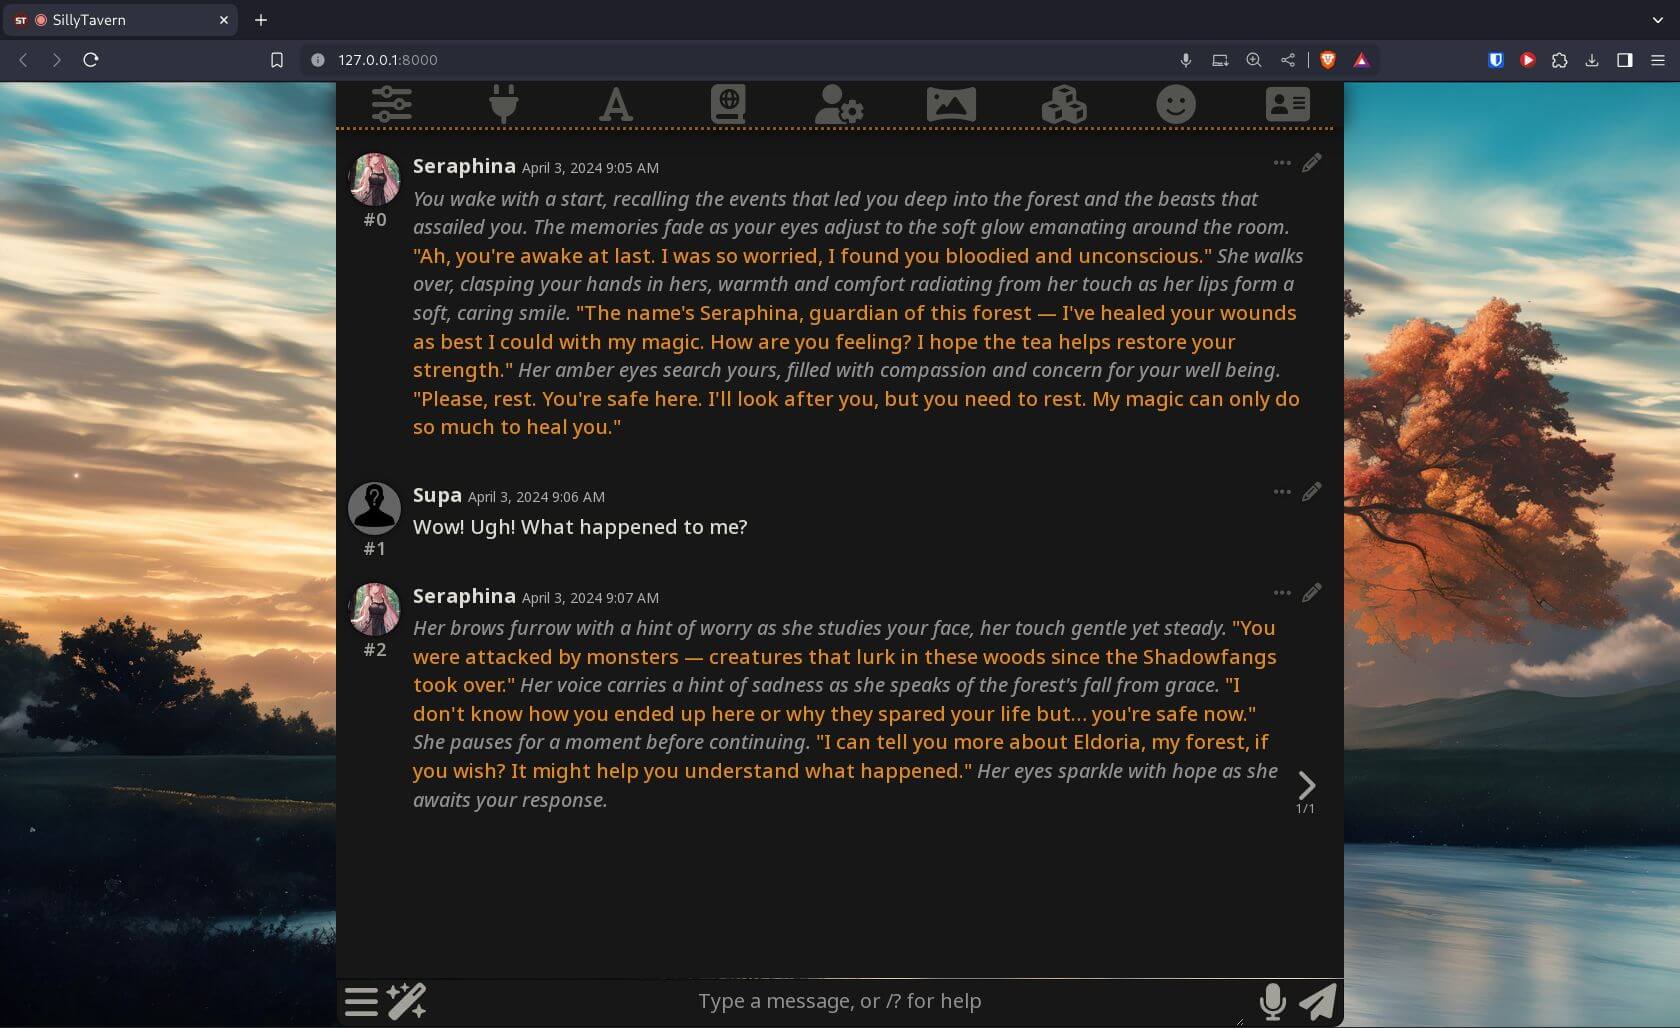
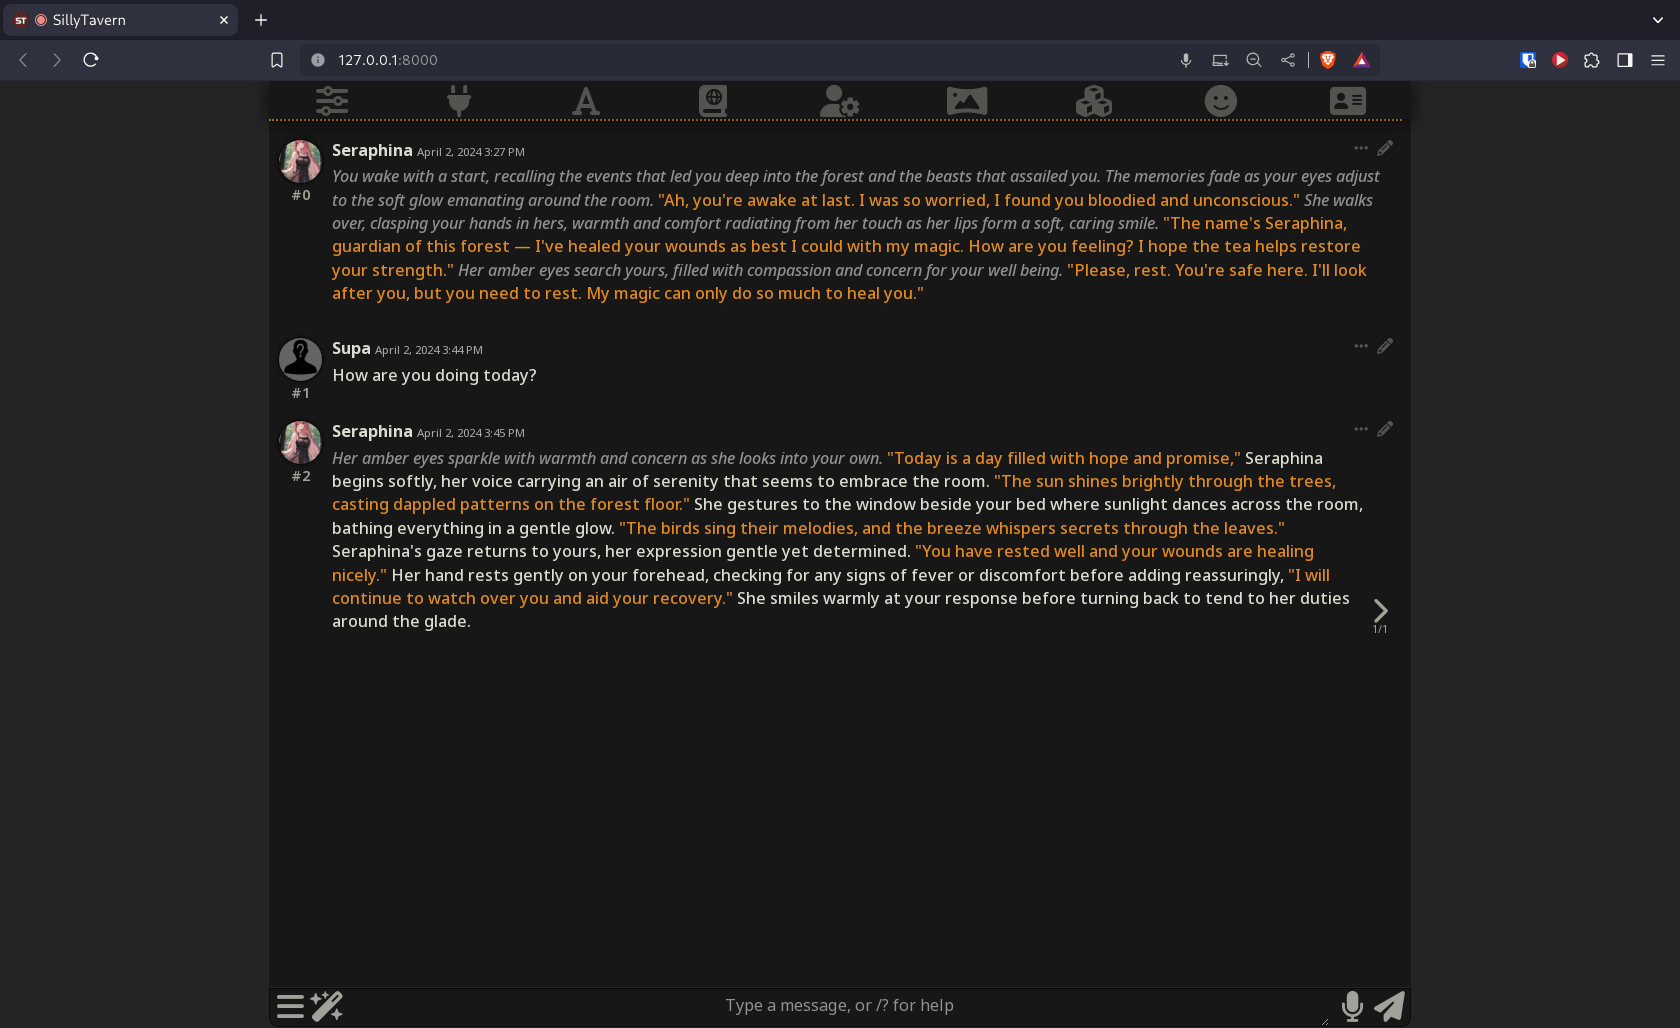
You can now start to chat with an AI character.
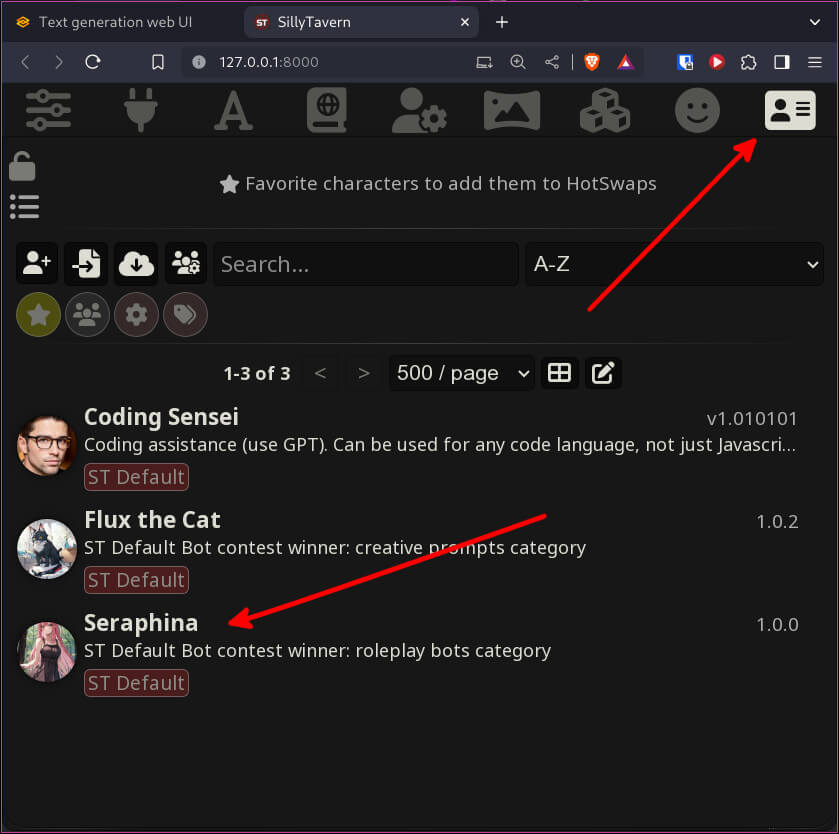
Left-click on the far right Character Management icon and choose the character Seraphina from the list. This will automatically make her available to chat to. Start chatting with her to test that everything is working.
You can now have fun chatting and interacting with the characters in text. However, we can make things even more interactive by having these characters listen to your voice and then respond back to you using voices of their own. In step three we will cover how to set this up to really bring your roleplay to life.
Step. 3: AllTalk
The alltalk_tts is a text-to-speech API, which you can use to have your AI characters respond back to you using voice. The quality of the voices is about the best I've heard so far for running locally on a PC. It is far better (IMHO) than the SileroTTS which I covered in one of my previous guides for the text-generation-webui.
conda
If you don't have miniconda already installed, follow these steps in a new terminal window:
1mkdir -p ~/miniconda3
2wget https://repo.anaconda.com/miniconda/Miniconda3-latest-Linux-x86_64.sh -O ~/miniconda3/miniconda.sh
3bash ~/miniconda3/miniconda.sh -b -u -p ~/miniconda3
4rm -rf ~/miniconda3/miniconda.sh
then:
1# For Bash users
2~/miniconda3/bin/conda init bash
3## For zsh users
4~/miniconda3/bin/conda init zsh
alltalk_tts
There are a few ways to install alltalk_tts as shown on its GitHub page, however, we will be performing a standalone install, so we can use it with SillyTavern though its API.
First let's download and install alltalk_tts. Open a new terminal and enter:
1git clone https://github.com/erew123/alltalk_tts.git
We are now going to create a conda environment for alltalk, activate the environment and install the requirements for NVIDIA:
Open a new terminal window and enter:
1conda create --name alltalkenv python=3.11.5
2conda activate alltalkenv
3cd alltalk_tts
4pip install -r system/requirements/requirements_standalone.txt
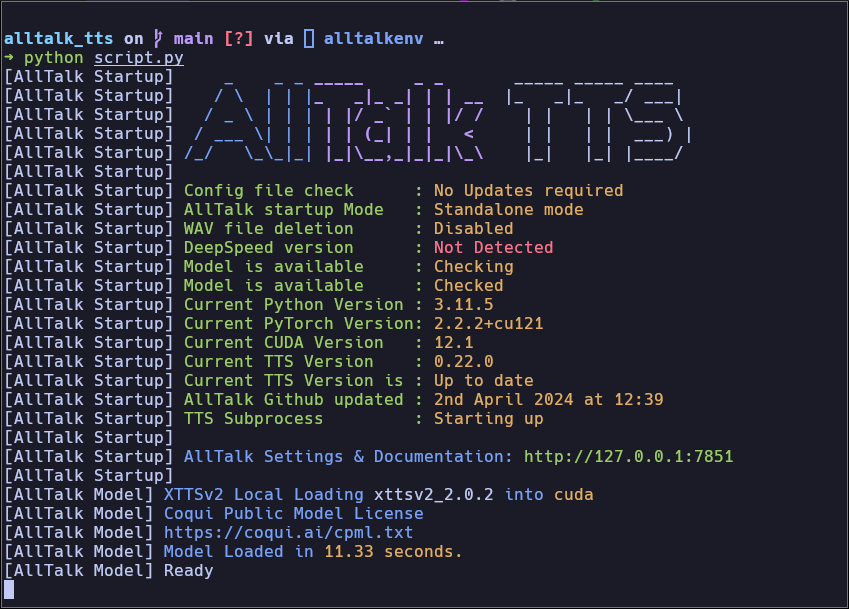
We can then run alltalk_tts with the following command:
1python script.py
The first time you run alltalk_tts, you'll see it download a bunch of model files. Once complete it will be active and running:
Back over in the SillyTavern browser tab, left-click on the Extensions icon, (the one which looks like three cubes stacked) and select the TTS drop-down menu.
In the Select TTS Provider menu - choose AllTalk. The AllTalk Endpoint should be the same URL which you see in the terminal. The default is http://localhost:7851 on my machine. Tick the Enabled check box. You can see that the AT Narrator is set to female_01 by default. You can change this if desired.
This window is where you can set your AI characters voice whenever you add a new character into chat. If a character has no voice when chatting:
- Select a character from the character management icon.
- Click on the Extensions icon
- Select your characters name in the AllTalk options and choose a voice for them.
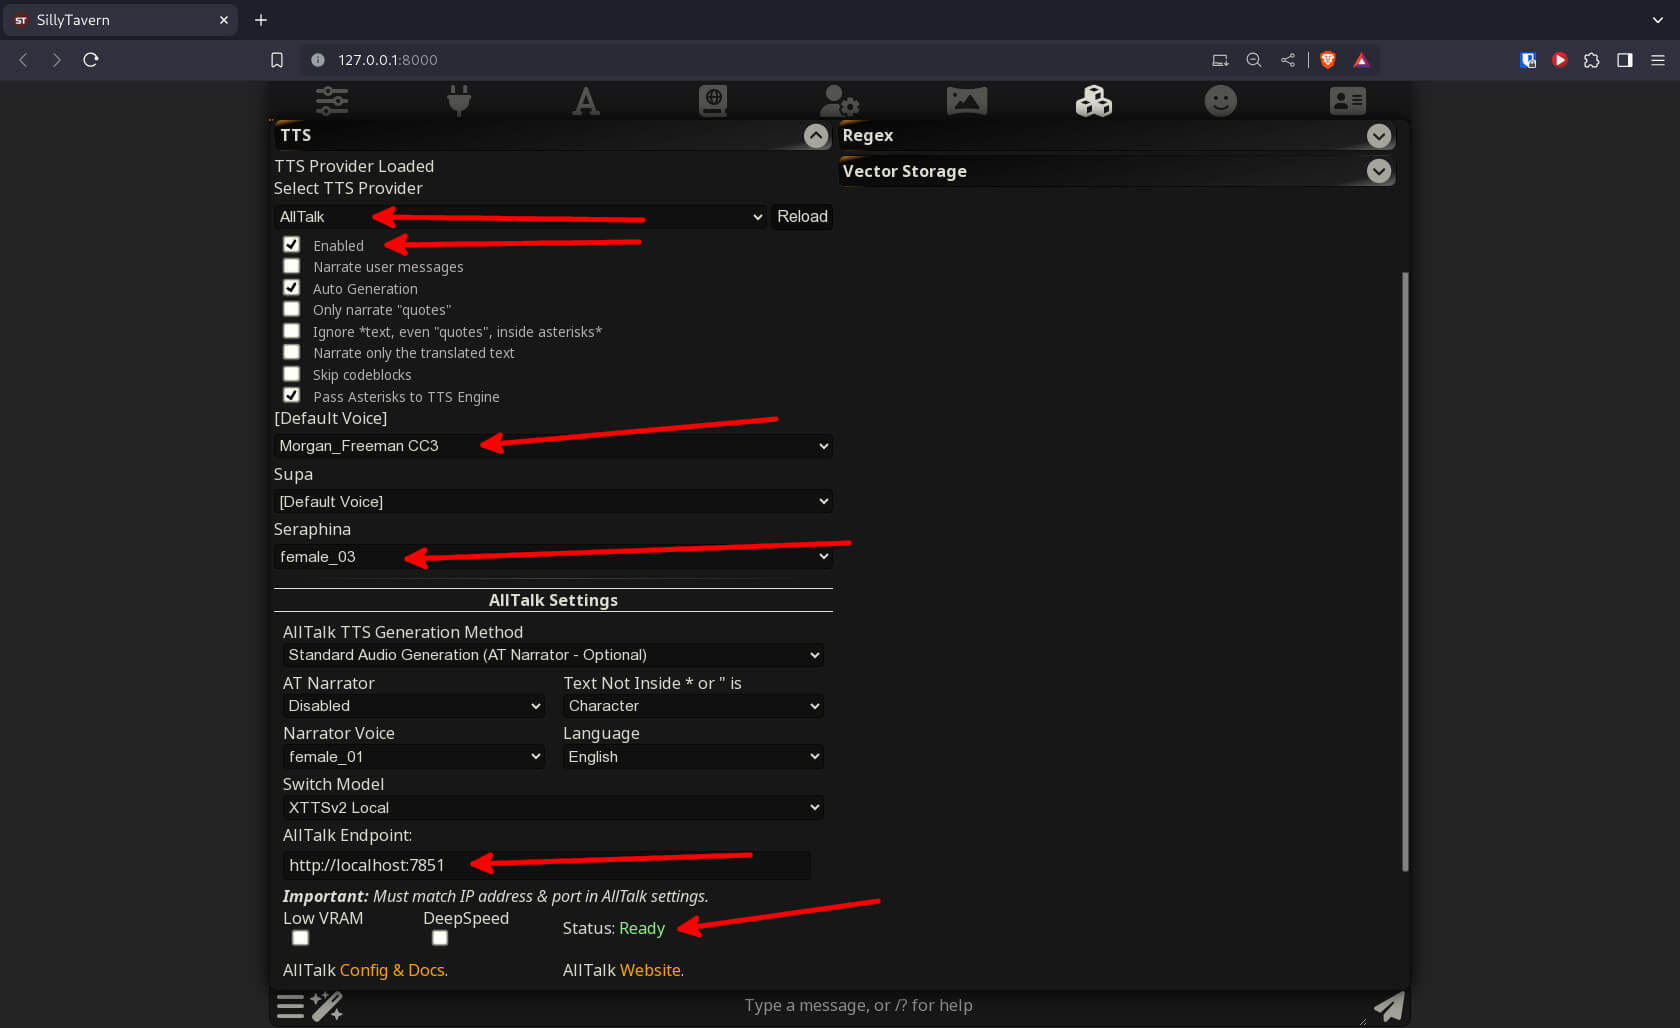
Once the voice fields have been set to a voice for your characters, SillyTavern will remember them for each use.
Speech Recognition
In order to talk to your characters via your microphone, you'll need to install the Speech Recognition extension in the Extensions section.
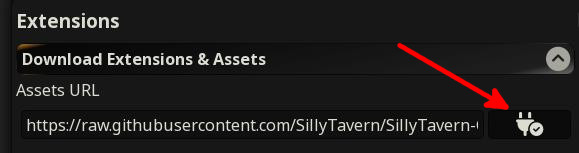
- Left-click the Extensions icon and select the Download Extensions & Assets drop-down.
- Left-click the red plug icon to get a list of extensions.
Left-click on the Speech Recognition extension and install it.

Enable Speech Recognition
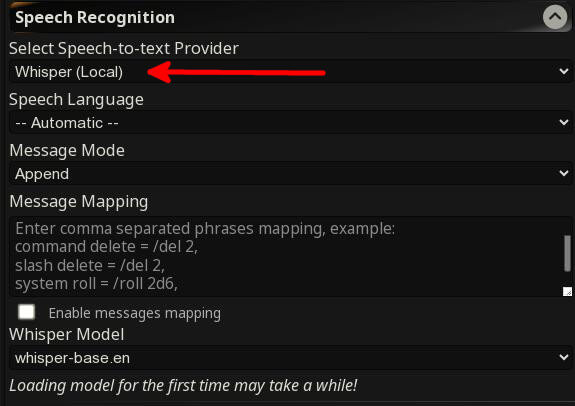
Left-click on the Speech Recognition extension and select Whisper (Local) from the drop-down.
You should now be able to press the microphone icon on the bottom right of the chat window and talk. The Whisper model will convert you voice into text, then it can be entered into the chat to talk to the AI. After a few seconds, your AI will now respond back to you using the voice which you chose for it in the TTS extension options.

If you want to have your voice sent automatically after you have spoken and pressed the microphone icon to end your voice recording - set the Message Mode to Auto send.
As you can hear from the example output above, the voice quality sounds more natural than SileroTTS.
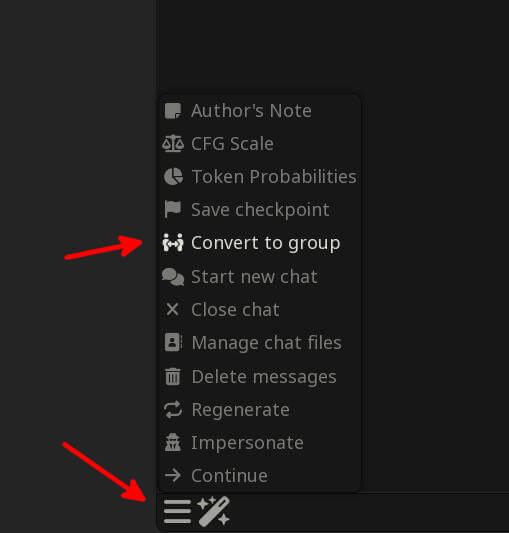
AI Group Chat
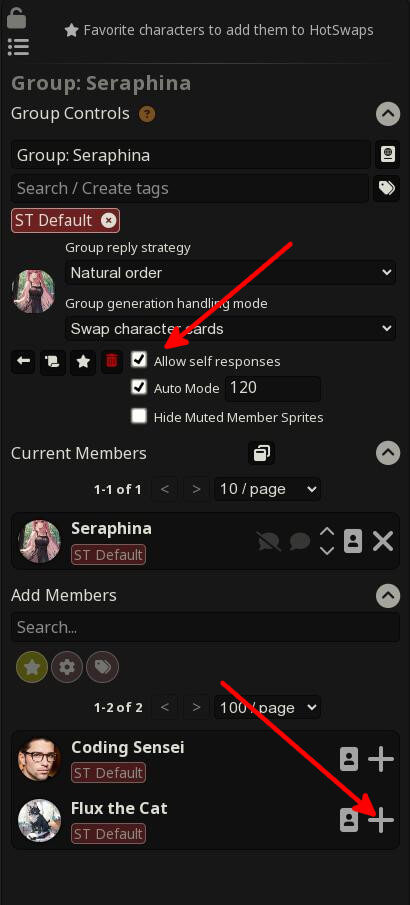
Why have one AI to talk to, when you can have more?! Left-click on the burger icon on the bottom-left of the chat window. Here, you can set the chat to a group chat by pressing the Convert to group option and selecting Yes.
Now, you can add in another AI character from the Character Management section. Let's add Flux the Cat. Tick the Allow self responses box and set a time limit for about 300 seconds. Then press the + sign on Flux the Cat to add him into the group chat.
You can then use what you have learned above to give him his own voice in the Extensions > TTS section.
Enjoy
I hope you have fun playing with the SillyTavern UI. I've had lots of laughs with this over the last few weeks, and this is why I wanted to share this guide, so others could have fun. Not to mention that all this is running locally and privately, which is an added bonus.
Since this is already a lengthy guide, I couldn't explain everything that SillyTavern can do. This will probably be something I'll go over in future guides. For a deep-dive, please read the SillyTavern official documentation.
Helpful Resources
- r/SillyTavernAI
- r/Oobabooga
- https://www.chub.ai/ - A resource for additional Tavern AI characters (NSFW)
- The full guide for all the SillyTavern options can be found here: https://docs.sillytavern.app/
- If you need help with "out of VRAM" errors, please read the text-generation-webui discussions page.
