Pimp your prompt!
Linux, for me, is all about having fun, having control and having the option to customize the snot out of everything! There is no better feeling than having an operating system work the way you want it to work and look awesome while doing it.
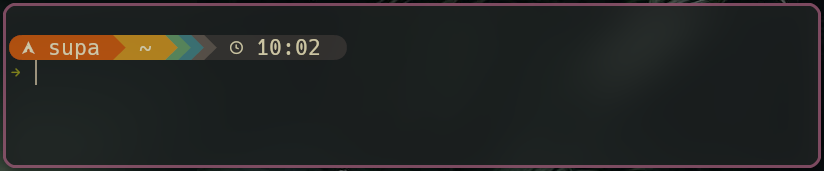
I've used many prompts over the years, however, this week, I've been playing with the Starship prompt, and, it's really cool. It is very fast and flexible, is cross-platform, supports many shells and is very easy to set up.
Prerequisites
Nerd Fonts
If you haven't done so already - install a Nerd Font. These are important as they have the necessary glyphs which the starship prompt needs to display information. You need to ensure that you are using the Nerd Font you've selected in your terminal for it to work correctly.
I'm using Arch Linux, So, I'll quickly install a few Nerd Fonts for this example:
1yay -S ttf-hack-nerd ttf-ubuntu-mono-nerd ttf-ubuntu-nerd ttf-jetbrains-mono-nerd
Now the fonts are installed - refresh the font cache:
1fc-cache -f -v
I can quickly see which Nerd Fonts I already have installed by entering:
1yay -Qs nerd
Then, search for the font family name that I wish to use with the kitty terminal:
 1kitty list-fonts | grep -Ei "jetbrainsmono"
 2# returns:
 3JetBrainsMono Nerd Font
 4    JetBrainsMono NF Bold
 5    JetBrainsMono NF Bold Italic
 6    JetBrainsMono NF ExtraBold
 7    JetBrainsMono NF ExtraBold Italic
 8    JetBrainsMono NF ExtraLight
 9    JetBrainsMono NF ExtraLight Italic
10    JetBrainsMono NF Italic
11    JetBrainsMono NF Light
12    JetBrainsMono NF Light Italic
13    JetBrainsMono NF Medium
14    JetBrainsMono NF Medium Italic
15    JetBrainsMono NF Regular
16    JetBrainsMono NF SemiBold
17    JetBrainsMono NF SemiBold Italic
18    JetBrainsMono NF Thin
19    JetBrainsMono NF Thin Italic
20JetBrainsMono Nerd Font Mono
21    JetBrainsMono NFM Bold
22    JetBrainsMono NFM Bold Italic
23    JetBrainsMono NFM ExtraBold
24    JetBrainsMono NFM ExtraBold Italic
25    JetBrainsMono NFM ExtraLight
26    JetBrainsMono NFM ExtraLight Italic
27    JetBrainsMono NFM Italic
28    JetBrainsMono NFM Light
29    JetBrainsMono NFM Light Italic
30    JetBrainsMono NFM Medium
31    JetBrainsMono NFM Medium Italic
32    JetBrainsMono NFM Regular
33    JetBrainsMono NFM SemiBold
34    JetBrainsMono NFM SemiBold Italic
35    JetBrainsMono NFM Thin
36    JetBrainsMono NFM Thin Italic
37JetBrainsMonoNL Nerd Font
38    JetBrainsMonoNL NF Bold
39    JetBrainsMonoNL NF Bold Italic
40    JetBrainsMonoNL NF ExtraBold
41    JetBrainsMonoNL NF ExtraBold Italic
42    JetBrainsMonoNL NF ExtraLight
43    JetBrainsMonoNL NF ExtraLight Italic
44    JetBrainsMonoNL NF Italic
45    JetBrainsMonoNL NF Light
46    JetBrainsMonoNL NF Light Italic
47    JetBrainsMonoNL NF Medium
48    JetBrainsMonoNL NF Medium Italic
49    JetBrainsMonoNL NF Regular
50    JetBrainsMonoNL NF SemiBold
51    JetBrainsMonoNL NF SemiBold Italic
52    JetBrainsMonoNL NF Thin
53    JetBrainsMonoNL NF Thin Italic
54JetBrainsMonoNL Nerd Font Mono
55    JetBrainsMonoNL NFM Bold
56    JetBrainsMonoNL NFM Bold Italic
57    JetBrainsMonoNL NFM ExtraBold
58    JetBrainsMonoNL NFM ExtraBold Italic
59    JetBrainsMonoNL NFM ExtraLight
60    JetBrainsMonoNL NFM ExtraLight Italic
61    JetBrainsMonoNL NFM Italic
62    JetBrainsMonoNL NFM Light
63    JetBrainsMonoNL NFM Light Italic
64    JetBrainsMonoNL NFM Medium
65    JetBrainsMonoNL NFM Medium Italic
66    JetBrainsMonoNL NFM Regular
67    JetBrainsMonoNL NFM SemiBold
68    JetBrainsMonoNL NFM SemiBold Italic
69    JetBrainsMonoNL NFM Thin
70    JetBrainsMonoNL NFM Thin Italic
and finally, add the required font into my kitty terminal config:
1vim ~/.config/kitty/kitty.conf
 1#  ~/.config/kitty/kitty.conf
 2
 3font_family      JetBrainsMono NF
 4bold_font        JetBrainsMono NF Bold
 5italic_font      JetBrainsMono NF Italic
 6bold_italic_font JetBrainsMono NF Bold Italic
 7
 8font_size 12.0
 9
10confirm_os_window_close 0
11
12# BEGIN_KITTY_THEME
13# Gruvbox Dark Hard
14include current-theme.conf
15# END_KITTY_THEME
Starship Installation
We can easily install Starship with pacman:
1sudo pacman -S starship
Now, I'll create a home for its config file and set a theme preset:
1mkdir -p ~/.config/starship/
2starship preset gruvbox-rainbow -o ~/.config/starship/starship.toml
I use Bash and Zsh for the shells on my system. Therefore, I'll be adding the Starship configuration into both my .bashrc and .zshrc like so:
If you have used another prompt prior to using Starship, you may want to disable it first, so they do not conflict with each other.
.bashrc
1# ~/.bashrc
2
3export STARSHIP_CONFIG=~/config/starship/starship.toml
4eval "$(starship init bash)"
.zshrc
1# ~/.zshrc
2
3export STARSHIP_CONFIG=~/config/starship/starship.toml
4eval "$(starship init zsh)"
Installation instructions for other systems and shells can be found on the Starship installation page.
Customizing
There are many cool custom theme configurations online for you to take inspiration from when customizing your own prompt. The syntax is pretty straightforward and easy to understand once you get the hang of it. I started with one of the preset themes and made some small edits to it.
As with most config files, you can easily change things to suite your needs. Since I'm always working with Git projects, sometimes it's handy to understand the changes in my projects.
So, with that in mind, I added a few status glyphs to the starship.toml file to provide some quick information for git repos:
 1# Edits to .config/starship/starship.toml
 2[git_status]
 3style = "bg:color_aqua"
 4ahead = "[[ 🛺 💨 ${count}](fg:color_fg0 bg:color_aqua)]($style)"
 5untracked = "[[ 🛤 ${count}](fg:color_fg0 bg:color_aqua)]($style)"
 6staged = "[[ 🗃 ${count}](fg:color_fg0 bg:color_aqua)]($style)"
 7stashed = "[[ 📦 ](fg:color_fg0 bg:color_aqua)]($style)"
 8behind = "[[ 🐌 ${count}](fg:color_fg0 bg:color_aqua)]($style)"
 9conflicted = "[[ ⚔️ ](fg:color_fg0 bg:color_aqua)]($style)"
10diverged = "[[ 🔱 🏎 💨 ${ahead_count} 🐢 ${behind_count}](fg:color_fg0 bg:color_aqua)]($style)"
11modified = "[[📝${count}](bg:color_aqua)]($style)"
12renamed = "[ [📛 ${count}](fg:color_fg0 bg:color_aqua)]($style)"
13deleted = "[[ 🗑 ${count}](fg:color_fg0 bg:color_aqua)]($style)"
14format = "$all_status$ahead_behind"
I'm sure I'll be creating more themes for Starship as I use it. There are a tonne of options to configure if you have the patience to look through them all.
