oobabooga: AI voice chat
I've been playing around more with AI tools, and recently discovered a fun way to use your voice to talk to a "conversational AI". The cool thing about it, is that it can respond back to you using its own voice. This uses (NLP) natural language processing, which is the ability for computers to understand meaning from spoken language.
oobabooga!
I've been using the "text-generation-webui" by "oobabooga", which is a "gradio" web UI for running "Large Language Models". Once installed and configured, it's a really fun way to experiment with AI voice chat, and the interface comes with a selection of built-in extensions too use.
System Requirements
If you're serious about doing any kind of AI related stuff on your home PC, then you're going to want to ensure that your PC is up to it. For anything larger than the models I'm using in this guide - you will need a fast CPU and graphics card with at least 12 GB or more VRAM.
If like me however, you are still rocking that trusty old PC which has been chugging along with the same hardware since 2015 - so long as it has an NVIDIA 9xx series graphics card and higher - this guide may help you dip your toe into the ocean of AI chat.
For this example, I'm using:
- CPU: Intel 4790K
- RAM 16 GB of DDR3
- GFX: ASUS NVIDIA GTX 970 graphics card with 4 GB of VRAM.
- 20 TB storage (SSD/HD).
This is hardly the ideal system hardware to do any kind of AI related work - as it just isn't powerful enough. If you're using newer hardware and, more importantly, a graphics card with oodles of VRAM, you'll have a far better experience.
Installing
The "oobabooga/text-generation-webui" can be quite "fiddly" to set up, and, on top of that, depending on your particular OS and hardware, you may have to adjust your installation from the one given in my example.
Some people have had success using the one-click-installer scripts to get things going. Sadly, I ran into some issues with these, especially when it comes to Python packages being installed. Therefore, I chose to install this manually using Miniconda to manage its dependencies.
Miniconda
In order to prevent dependency hell when it comes to installing all the necessary Python packages, I'll be using Miniconda, for managing my the Python packages, dependencies and environments.
To install Miniconda, open a terminal and enter:
1curl -sL "https://repo.anaconda.com/miniconda/Miniconda3-latest-Linux-x86_64.sh" > "Miniconda3.sh"
then:
1bash Miniconda3.sh
1Welcome to Miniconda3 py311_23.5.2-0
2
3In order to continue the installation process, please review the license
4agreement.
5Please, press ENTER to continue
Press enter at the prompt, then scroll down to the end of the licence text, then type yes, then press Return and yes to further prompts to download and complete the installation of Miniconda.
This will create a folder named miniconda3 in your $HOME folder. Don't delete this as it contains the files needed to manage your environments.
:memo: Close your current terminal window. Then open a new terminal window.
Creating a conda environment
After you have opened a new terminal window, you'll see that your shell prompt shows the base conda environment.
You can check for which environments are available by typing:
1conda env list
1# conda environments:
2#
3base                  *  /home/supa/miniconda3
We need to create a new conda environment for the text-generation-webui. This will allow for any Python packages or dependencies we install to be isolated for that project, and not part of the base environment.
Create the textgen environment, install Python version 3.10, and activate the environment:
1conda create -n textgen python=3.10.9
2conda activate textgen
You should now see that the command prompt has changed to show that we are in the conda environment we just created, named "textgen".
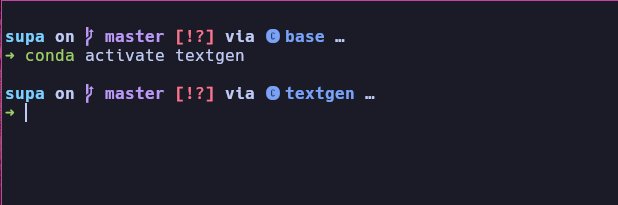
The conda activate name command is important to keep in mind when installing or upgrading dependencies later on. Check your shell prompt to ensure you are in the correctly named conda environment.
Install Pytorch
Next we need to install Pytorch. Since I'm using Arch Linux and an NVIDIA graphics card, I will be installing Pytorch with the following command:
1# for Linux plus NVIDIA only
2pip3 install torch torchvision torchaudio
This will take a few seconds to install, so be patient.
Installing the web UI
We now need to download the oobabooga/text-generation-webui repository using git, then change directory to that project, and install the Python packages required for it to run.
1git clone https://github.com/oobabooga/text-generation-webui
2cd text-generation-webui
3pip install -r requirements.txt
Install Voice Extensions
The "whisper_stt" extension allows you to talk to the bot using your microphone. It converts your spoken words into text and sends it the AI bot to respond to.
To install its dependencies - from within your text-generation-webui/ folder type:
1cd extensions/whisper_stt/
2pip install -r requirements.txt
The SileroTTS extension allows your bot to talk to you using voice. Let's change directory to SileroTTS folder and install its dependencies too:
1cd ../silero_tts/
2pip install -r requirements.txt
I've installed these two extensions to get voice working for now. However, there are more extensions that you may wish to check out. If you are interested, you can find them here.
Once pip has finished installing the requirements.txt, go back to the projects main directory:
1cd ../../
Downloading a model
In order for the text-generation-webui to work, you will need to install a model to the $HOME/text-generation-webui/models/
folder. Some trained chat models can be over 5 GB in size, so ensure you have plenty of free disk space to save any additional ones at a later date.
Use the download-model.py script to download new models. Although there is a section on the web UI to do this, you can download multiple models from your terminal at the same time, which is way faster.
Once you find a model you'd like to test on the Hugging Face website - left-click on the copy icon next to the models name and middle-mouse-button paste it into your terminal after the Left-click the copy widget to copy the model name to the clipboard.download-model.py command.

Then, enter the model name into the terminal like this:
1python download-model.py facebook/opt-1.3b
This model is about 2.6 GB in size, so will take a minute or to download. For those of you with lots of VRAM and a superpowered PC, check out larger models on the Hugging Face website.
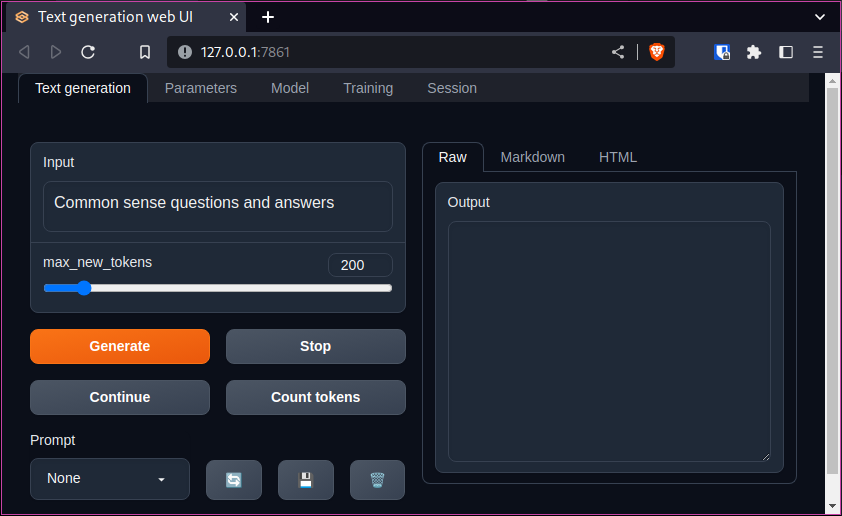
Starting the web UI
Every time you want to use the text generation webui, ensure you activate the conda environment first, then run it by typing:
1conda activate textgen
2cd text-generation-webui
3python server.py --extensions silero_tts whisper_stt
Once the model has loaded, you'll be provided with a URL in your terminal which you can left-clock to open the UI in your web browser.
1➜ python server.py
22023-07-16 20:44:22 INFO:Loading facebook_opt-1.3b...
32023-07-16 20:44:32 INFO:Loaded the model in 10.47 seconds.
4
5# CLICK THIS URL TO START THE WEB UI
6Running on local URL:  http://127.0.0.1:7860
7
8To create a public link, set `share=True` in `launch()`.
If you started the web UI from just clicking the URL in the terminal you can switch to Chat mode by clicking on the Session tab and change the Mode to chat
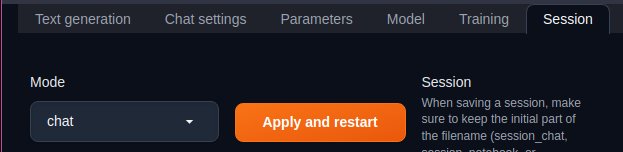
Now, press the "Apply and restart" button.
If you enter some text into the chat prompt, you'll see that the bot will respond to you.
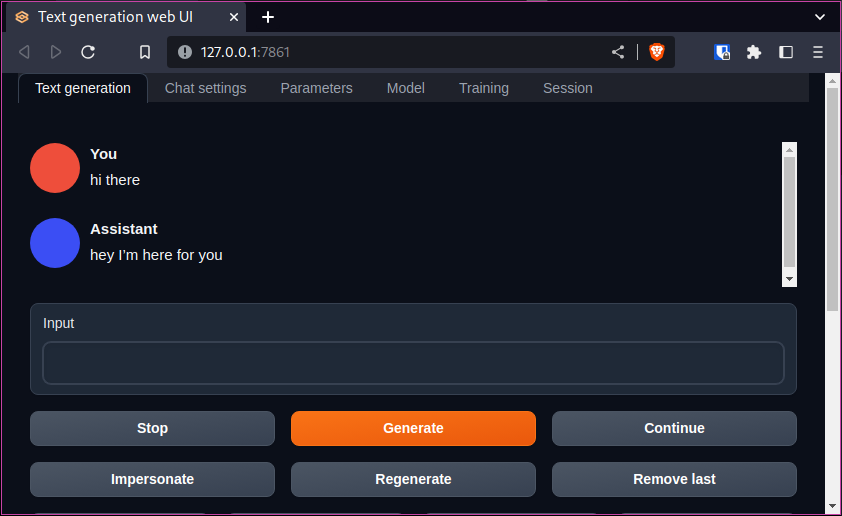
Using your voice
Scroll down on the chat page until you see the Whisper STT section. There will be a button there which says "Record from microphone", press this and talk to your AI bot. Once you have finished talking, press the same button and your voice will be sent to chat.
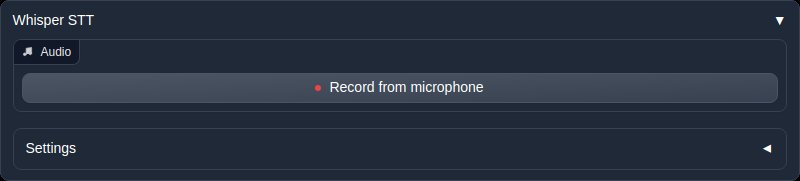
The first time you talk, the software will download a file in the background, but after a few seconds, your AI bot should reply to you using its synthesised voice.

Other Models
You can explore more models to choose from over at the Hugging Face website. There is an overwhelming amount of models to choose from, suited to every use case and hardware. I normally look for "Conversational" models to try. Just be aware that some models are very large, and your system may not be able to run them as some need huge amounts of VRAM to run.
NSFW Models
Some chat models are NSFW, and are intended for role playing, so be aware of this, otherwise conversations with NSFW or uncensored models can quickly turn, well, interesting! 😉😘
Model Testing
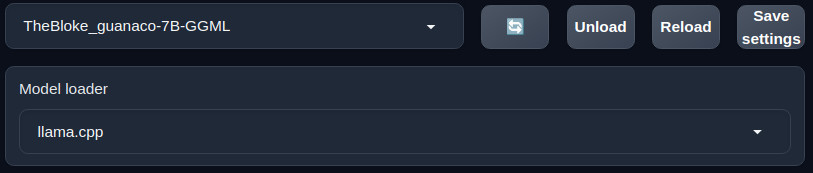
On my low powered PC, I can run the "TheBloke/guanaco-7B-GGML" model, and although a little slow, it does provide a more interactive experience over the facebook/opt-1.3b model, so you might want to check it out.
I've tried the TheBloke/Guanaco-7B-SuperHOT-8K-GGML model, and it does work with these launch parameters, although response times can be slow, from 20 to 35 seconds on my system for a response:
1python server.py --max_seq_len 8192 --compress_pos_emb 4 --loader exllama_hf --load-in-8bit --auto-devices --no-stream --gpu-memory 3500MiB --extensions silero_tts whisper_stt
Changing Models
You can change to a different model by clicking on the Model tab and selecting a new one which you have installed in the models folder from here.
If you have added a new model while the web UI is running - simply push the blue recycle icon to refresh any available models.
Out of Memory Errors
If you are on a low-end PC with low VRAM, you can try to launch the web UI with this set of commands.
1python server.py --load-in-8bit --auto-devices --gpu-memory 3500MiB --extensions="silero_tts whisper_stt"
A list of what these arguments do can be found on the documents page.
This should reduce CUDA out of memory errors and crashes on low VRAM GPU's.
Wrapping Up
This little project has been really fun to play with, and I hope it works for you too and you are having some interesting conversations with the AI bot.
Whenever you want to use the oobabooga/text-generation-webui, remember to do the following:
From a terminal:
1conda activate textgen
2cd /path/to/your/text-generation-webui/
3python server.py --extensions silero_tts whisper_stt
Have you found a good chat model to use on a local PC? If so, drop me an email to let me know, and I'll be sure to check it out. 👍
