KoboldCpp
In my previous post, I talked about how to install and configure the text-generation-webui, allTalk_TTS and SillyTavern. In this article I explain how to use KoboldCpp for use with SillyTavern rather than the text-generation-webui.
KoboldCpp is an all-in-one piece of software for using GGML and GGUF AI models. It's easy to install and configure, and I find that I am using this way more now than the text-generation-web-ui for AI role play, mainly because of how much faster it is for generating responses.
Installation
First, open a terminal and create a folder for where you would like KoboldCpp to be installed and make this our current directory:
1mkdir koboldcpp && cd koboldcpp
Model Download
If you haven't done so already, you'll need to download a chat model for use with KoboldCpp. We will use the same Lewdiculous/BuRP_7B-GGUF-IQ-Imatrix model which we used in my previous guide. So, head over to Lewdiculous /BuRP_7B-GGUF-IQ-Imatrix and download the model.
I downloaded it directly into the Koboldcpp folder using the wget command, as shown below:
1wget https://huggingface.co/Lewdiculous/BuRP_7B-GGUF-IQ-Imatrix/resolve/main/BuRP_7B-Q5_K_S-imat.gguf
Download KoboldCpp
Let's download KoboldCpp and make the file executable, so we can launch it from the terminal:
1curl -fLo koboldcpp https://github.com/LostRuins/koboldcpp/releases/latest/download/koboldcpp-linux-x64-cuda1150 && chmod +x koboldcpp
Git projects are usually updated constantly, and many things can change over a short period of time. Therefore, If the above command does not work, check the latest download URL.
Usage
Now that KoboldCpp is installed, we can run it:
1./koboldcpp
You will see a small window pop-up. This is where you can configure the settings for using it. You'll notice that is has a lot of options to configure, but the main one we are interested in, is the path pointing to the AI chat model.
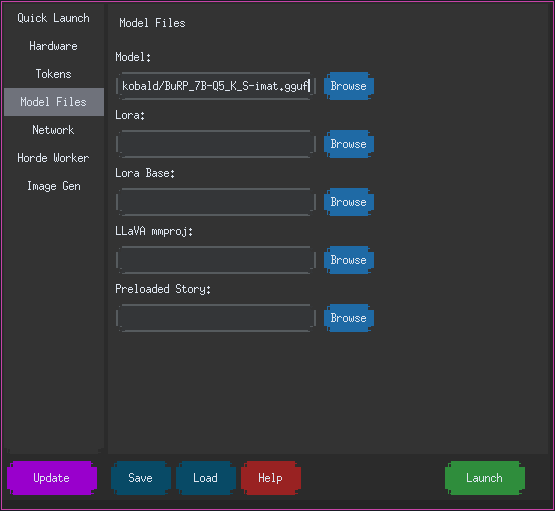
Navigate to the AI model you downloaded earlier and select the model in the Model: path as shown above.
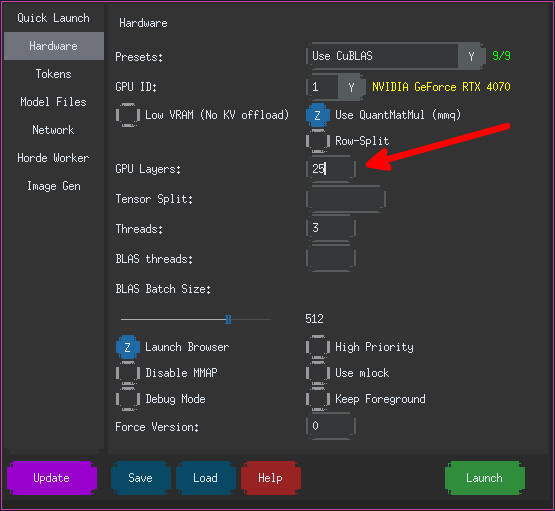
GPU Layers
On the Quick Launch - I entered 25 in the GPU Layers section, as I have an NVIDIA RTX 4070, this will offload a part of the AI processing to the GPU, which will make things faster.
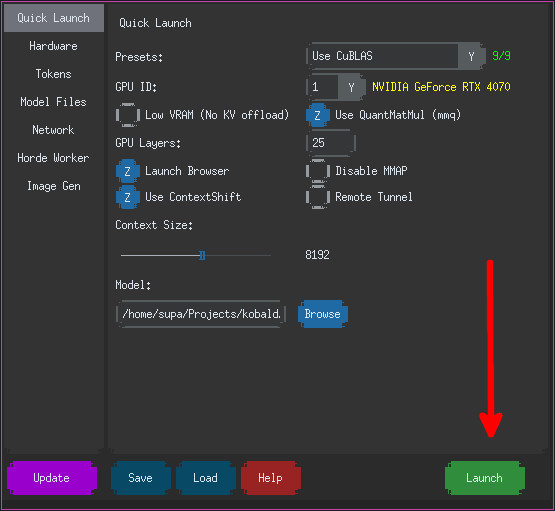
Now we can press the Launch button to load the model.
You can see that the model has been loaded by looking at your terminal.
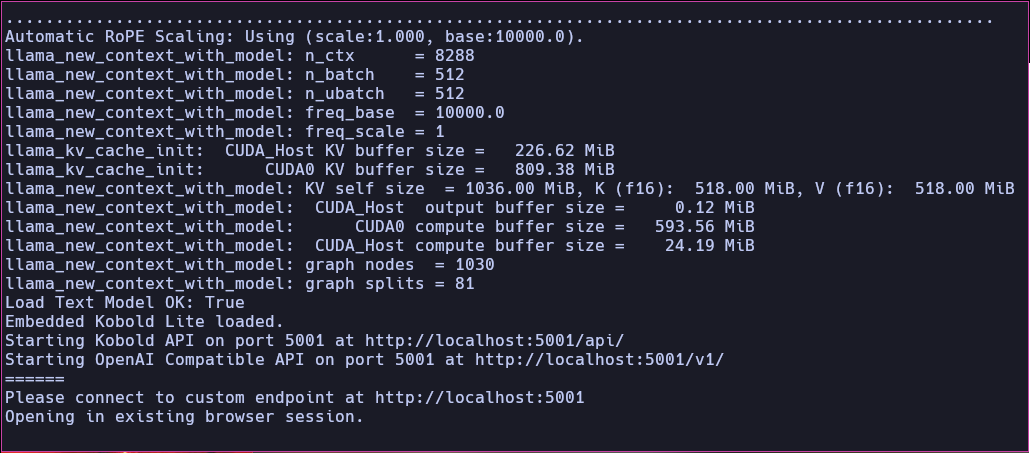
You can now click on the URL provided in the terminal to chat with the AI model.
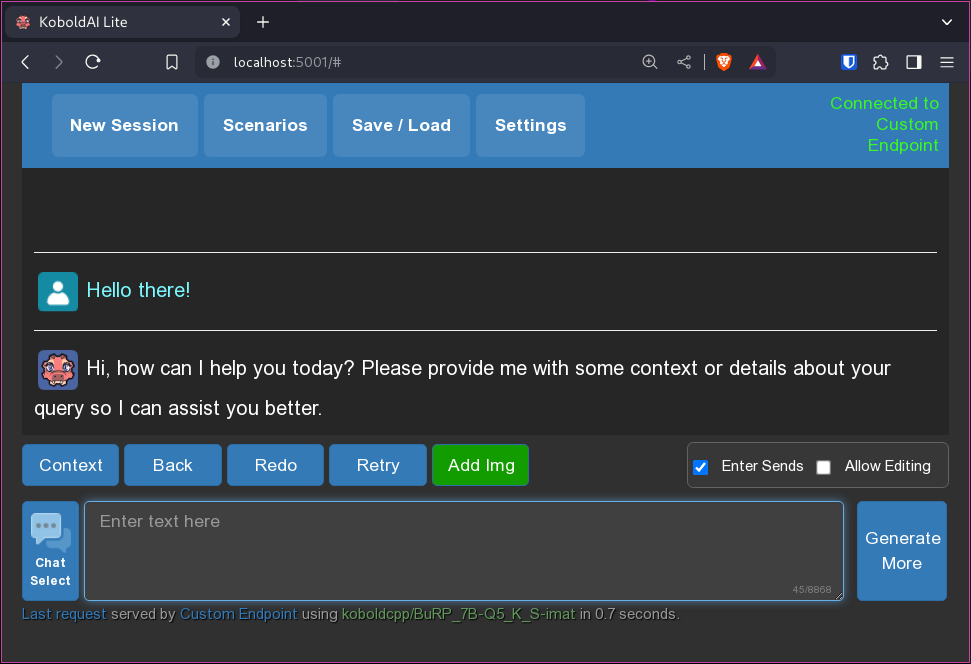
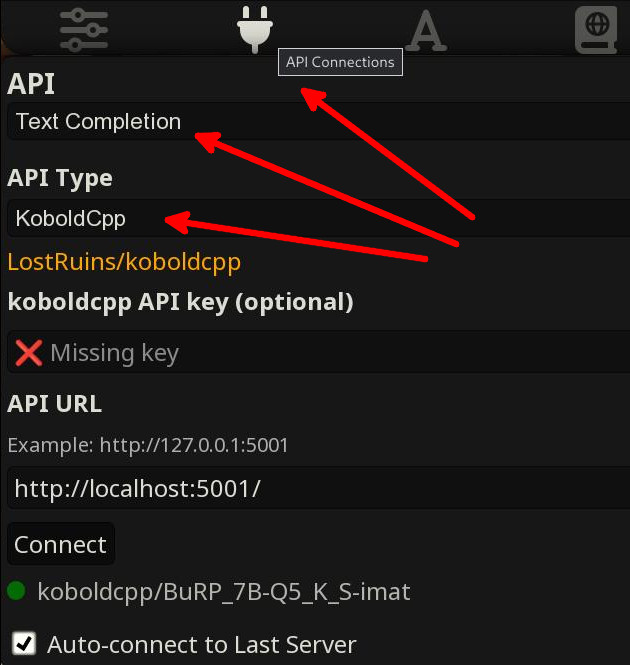
SillyTavern
To use KoboldCpp with SillyTavern, you simply need to left-click on the All Connectios button and set API to Text Completion and API Type to KoboldCpp
Happy chatting! 👨
