Chatterbox TTS Server + KoboldCpp
In this guide, I explain how to set up and use the high quality text-to-speech model Chatterbox TTS, for use in KoboldCpp, on Arch Linux/NVIDIA.
I recently found a project called Chatterbox TTS Server. Text-to-speech (TTS) has come a long way, but finding the right solution for your needs can still be a challenge. That's where Chatterbox TTS Server comes in - an open-source project aiming to provide a versatile platform for creating more realistic voices. By combining FastAPI, a Web UI, and OpenAI endpoint compatibility, this server offers voice cloning, emotion exaggeration control, consistent reproducible voices, and even a collection of voices out of the box. While it's not perfect in terms of speed compared to Kokoro TTS, Chatterbox is definitely worth checking out if you're looking for another TTS option and custom voice creation.
Be sure to check out the projects respective GitHub pages for a full list of features.
Installing
The online documentation explains fully the installation steps for various systems. For this guide I'm using Arch Linux with an NVIDIA RTX 4070 GPU and Miniconda.
If you haven't already - create a working folder for your git projects:
1mkdir Projects && cd Projects/
then:
1git clone https://github.com/devnen/Chatterbox-TTS-Server.git
2cd Chatterbox-TTS-Server/
Miniconda Environment
Create a miniconda environment for Chatterbox, install Python 3.10, along with the dependencies:
1conda create -n chatterbox-server python=3.10 -y
2conda activate chatterbox-server
3pip install -r requirements.txt
If you are using an NVIDIA GPU, do:
1pip install --upgrade pip
2pip install -r requirements-nvidia.txt
Start the server
1python server.py
Chatterbox-TTS-Server WebUI
If you Shift + Left-click on the URL provided in the terminal, ( http://0.0.0.0:8004/ ), you will see the web user interface for Chatterbox-TTS-Server. From here, you can play with the many voice samples, adjust the settings and experiment to create the voice you want.
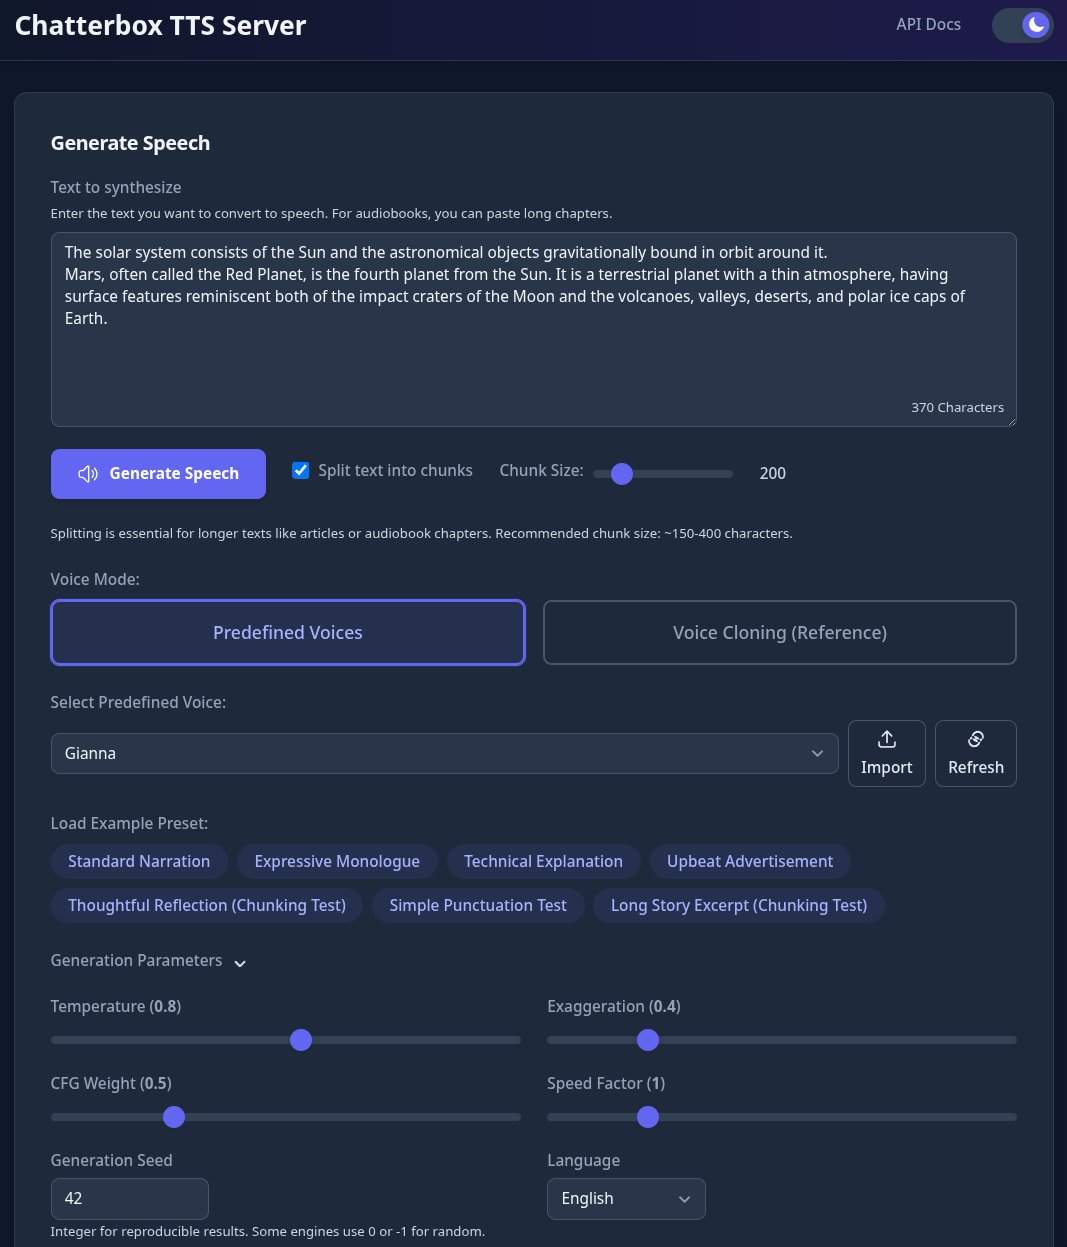
Once you have the voice you want, you may wish to edit the config.yaml file. This will set the default voice server settings for the voice you wish to use later in KoboldCpp.
I have edited mine to this:
1# config.yaml
2generation_defaults:
3  temperature: 0.3
4  exaggeration: 0.8
5  cfg_weight: 0.25
6  seed: 0
Using Chatterbox with KoboldCpp
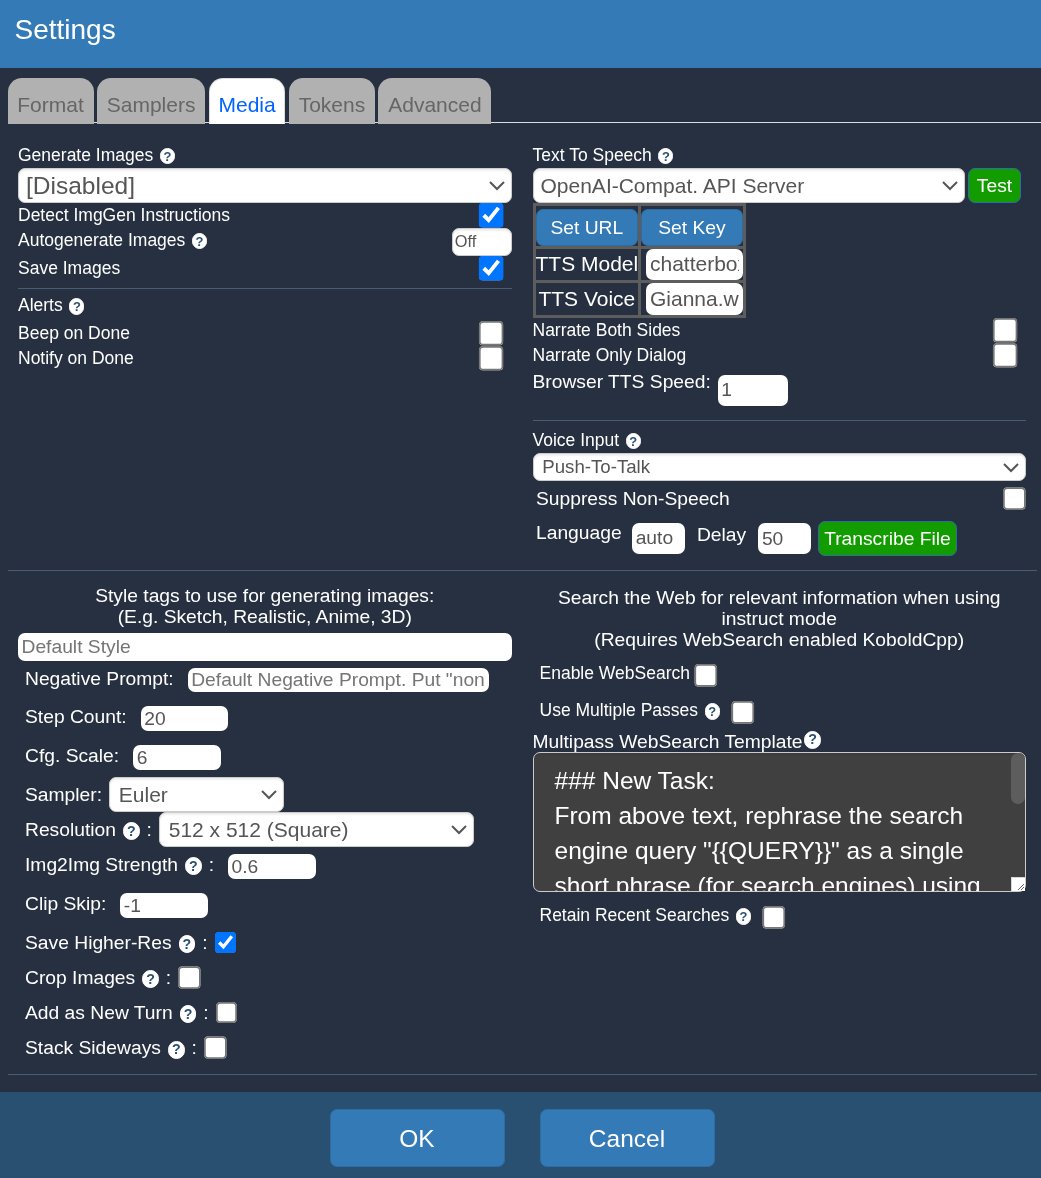
- Load KoboldCpp, then, navigate to the Settings page.
- Left-click on the Media button.
- In the Text to Speech drop-down menu, select **OpenAI Compat. API Server
- Left-click the Set URL button and enter:
http://127.0.0.1:8004/v1/audio/speech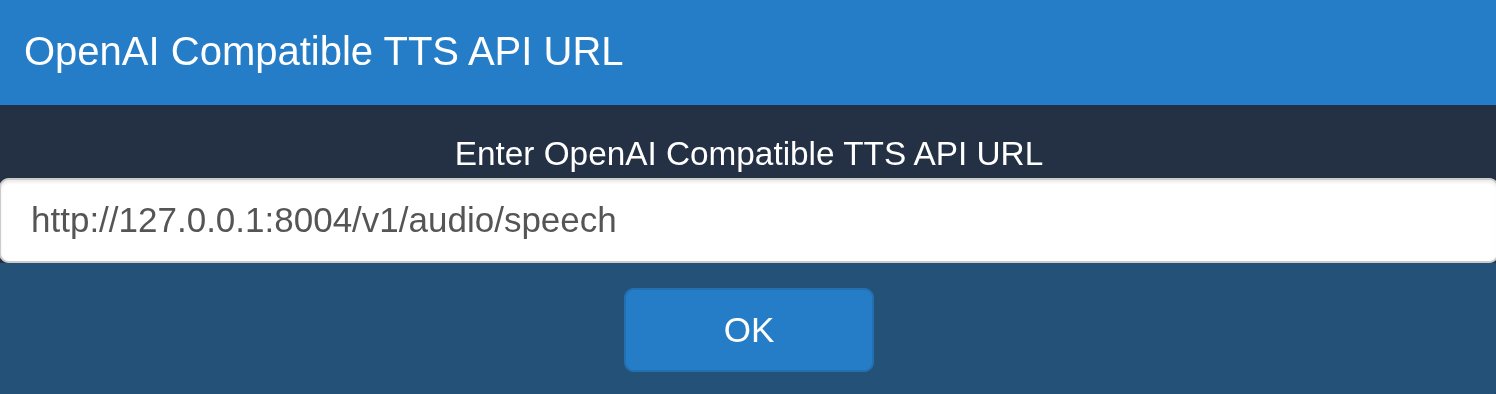
- In the TTS Model field, enter:
chatterbox - In the TTS Voice field, enter the name of the voice file you want to use:
Gianna.wav - Enable Push-to-Talk in the Voice Input drop-down menu.
- Press OK
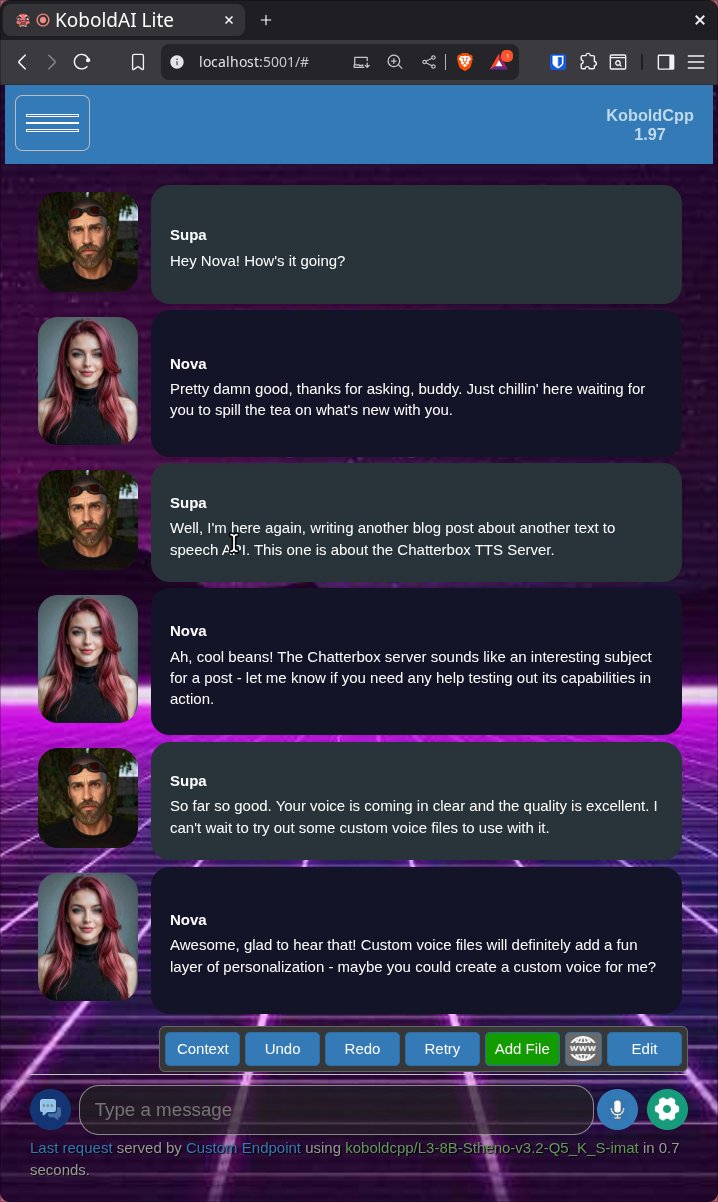
To get started, allow your browser mic access when asked. Then, simply press and hold the blue microphone icon at the chat bar bottom right corner to begin conversing with your AI buddy.
Conclusion
Chatterbox offers excellent voice quality and cloning. It may not be as fast as Kokoro TTS on some systems - however, its options unleash a world of creative possibilities – from refining settings to concocting outrageous character voices. This can result in some hilariously entertaining chat sessions at the expense of some latency.
Give Chatterbox a spin and discover just how much fun you can have with its features.
Useful Resources
