Fun With a Raspberry Pi 4
It's been a while since I've played with a Raspberry Pi. To me, they've always been the perfect device; you set one to do a job and sometimes completely forget that it's there. They are low cost, quiet in operation, consume low power, plus stable as hell as they run Linux.
These are brilliant little SBC's (Single Board Computer), which are a great entry point to anyone wanting to learn about computers, program, or tinker with the board itself. You only have to type "Raspberry Pi" into YouTube, and you'll see a myriad of little personal projects people use these little boards for.
I've owned a Raspberry 3 Model B+ for quite some time now, which I run as a private Mumble server for my friends and I to voice chat on. That thing has been running since the day I bought it, without a single crash.
The Raspberry Pi 4 Model B
I've been itching to get my hands on the new Raspberry Pi 4 Model B for a while. With its increased memory and speed I thought this would be a nice upgrade from my Raspberry Pi Model 3B+. So, this last weekend, I thought I'd treat myself, and promptly headed over to Amazon.co.uk and grabbed one.
The Raspberry Pi model I purchased was the 4 GB version. Amazon did have an 8 GB version available; however, I doubt I'd be doing such heavy multitasking on the device to max that out — plus the 4 GB version was easier on the wallet. I may end up buying an 8 GB model in the future, but for now, and what I want to use it for, the 4 GB will do fine.
The Extra Bits
To go along with the Pi, I picked up some other bits and bobs to make life easier when it comes to installing various operating systems I want to test out, as well as a nice big hard drive to store all my data on and maybe make a little NAS server further down the line.
This is a list of the other items I bought.
- Vanja USB 3.0 Card Reader
- CSL - USB 3.0 to SATA Adapter cable
- WD 10 TB Elements Desktop External Hard Drive - USB 3.0
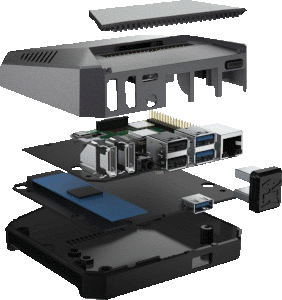
- Pimoroni Aluminium Heatsink Case for Raspberry Pi 4 (Tanzanite Purple)
The USB 3.0 Card Reader allows for the easy transfer of Raspberry Pi compatible OS's to SD card from my main PC. Burning the ".img" OS files to SD cards on my main PC is a bit faster than doing it from the Raspberry Pi itself and since I didn't already own a SD card reader, and I wasn't sure if Raspberry Pi OS came already loaded on the included SD card or not, so this purchase wasn't one I wanted to ignore.
The USB 3.0 to SATA Adapter cable will allow me to boot from a SSD through the Raspberry Pi USB 3 port. Using any Raspberry Pi OS from a USB connected SSD is a lot faster than using it from the normal SD card, so much so in fact, that a recent update to the Raspberry Pi EPROM supports this feature.
I'd like to see a built-in M.2 port on future Raspberry Pi's, as I think the benefits of having a faster boot device not only speeds everything up significantly, but avoids the inevitable "rats nest" of wires sprawling out of your Pi, which you will no doubt encounter if you decide to "A-Team" your own Pi to boot from USB 3 like I'm doing.
Installing Raspberry Pi OS
I did a quick search for "rpi-imager" in the AUR on Manjaro on my desktop PC and downloaded and installed it. This software allows you to easily download and burn an OS image to SD card for use in the Pi.
1yay -S rpi-imager
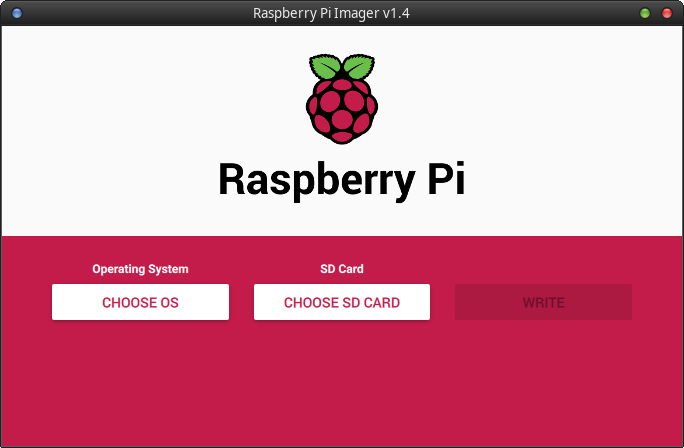
I selected the Raspberry Pi OS (32-bit) from the "Raspberry Pi Imager", plugged in the SD card into the USB SD card reader and... nothing! At first, I thought it was the SD card reader, so I unplugged that and tried another one. And... nothing!
As it turns out, it was a damaged the SD card that came wit the kit. Of course, me being a "derp", I didn't notice this until after an hour of me plugging and unplugging the SD card in and out of the PC via the SD card reader! Upon inspection of the SD card - I noticed that it was slightly bent, with a small hairline crack along the top of it. The SD card was completely damaged beyond repair. :unamused: Luckily, I had a spare Sandisk 64 GB SD lying around, so I used that instead. Then, after a short chat with Amazon customer support, they were kind enough to refund me the cost of the broken SD card. The new SD card worked perfectly, and little while later, the OS was written to the SD card, and it was time to boot up the Pi.

Raspberry Pi OS is a perfectly usable OS. It has all the basics to get you up and running. However, I wanted an OS which offers a bit more out of the box, had all the things I'd want to do on the Pi, like watching films, playing retro games, surfing the net, writing documents... So, it was time to look for something else.
Twister OS
Since I want to use the Raspberry Pi as basic desktop/media box, I found that Twister OS offered everything I was looking for. It comes packed with all the apps that I'd use on a daily basis preinstalled. Twister OS is built off the official Raspbian Pi OS, which means it has all the things that the official OS has, plus a lot more. Compared to what you get out of the box on Raspberry Pi OS, Twister OS is really packing.
Here are some of the awesome apps which come with Twister OS.
- box86 is an app which allows you to run x86 software on the Raspberry Pi.
- "Commander Pi" allows easy control of the Raspberry Pi features from a simple GUI.
- Retro Pie is a suite of software for emulating games from lots of old platforms from Amiga, NES, MAME, SNES, Gameboy, Sega Megadrive, Atari...
- Kodi allows you to view all your media from a single user interface, from films, TV shows, photos, music.
- "Chromium Media Edition" is a patched version of Chromium to allow you to watch DRM content from the likes of Netflix.
- Libre Office a full open source office suite.
- Gimp a cross-platform image editor.
Third Party Cases
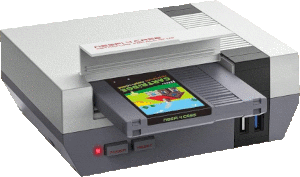
I did try to use the RETROFLAG NESPi 4 Case as I loved the look of this case, and it showed promise in solving the "wires everywhere" issue. Sadly though, the unit I bought from Amazon was DOA and I had to send it back. While this unit does look like a fun and cool design — I found it to be pretty expensive for what it offered, and later found out from other users that it oddly didn't fully support booting an OS from SSD even though one of its main features is a built-in 2.5" hard drive caddy. Since I didn't get to fully use the case myself, I can neither confirm nor deny this, however I cautiously decided to wait a little longer for other case designs coming toward the end of 2020.
One Raspberry Pi case I will be keeping an eye on will be the Argon ONE M.2, which will come with an M.2 connector and looks like a really stylish and clean design. At time of writing, this case is on pre-order from their website. I hope to pick one of these up in future and see how it performs. From the design, it does look to be one of the better Raspberry Pi 4 cases out there.
Conclusion
I'm pleased with my new Raspberry Pi 4, It is a solid update from the older Raspberry Pi revisions and I can't wait to tinker more with it. If you are going to use a Pi with a desktop OS, I'd highly recommend using a SSD via a USB 3 port, rather than a SD card. Everything just feels a lot faster.