Manage dotfiles with a "git bare" repository
Maybe, you've bought a new computer, and you want to move your application settings from the old PC to the new one. Maybe your friend wishes to have the same configuration files that you use, but he lives on the other side of the planet. Perhaps you updated some settings at home, but need a quick way to transfer them to your machine at work? Forget ZIP files, email, Dropbox or USB sticks - a git bare repository for managing your dotfiles could just be what you're looking for.
What are dotfiles?
Whenever you use applications in Linux, the settings for those applications are usually stored in your $HOME folder. These files and folders are hidden by default, and prefixed by a period, . or "dot", hence the name "dotfiles".
For example: .config/, .bashrc, .zshrc ...
Both command line and graphical programs will save their settings in these hidden files and folders, and, if you've spent time configuring your applications, your dotfiles are where your applications will load their settings from each time you load them.
When it comes to managing your dotfiles for use on more than on system however, it can be a bit of a pain to have to manually locate each one and transfer them over. Furthermore, what if you make regular changes to these files? It all starts to get out of control pretty quickly. This is where using a git bare repository for dotfiles can help. It allows you to place your dotfiles under source control and make the job easier.
What is a git bare repository?
Unlike a normal git repository, a git bare repository has no working tree. What the hell is a working tree? Well, a working tree is a folder that contains your files. If you're working on a project, then this is the place where you would add/remove or edit your files. In a normal git repository, you have a hidden folder named .git. In fact, when we use the name "repository", the .git folder is actually the repository part, the place where you manage your files is the "workspace" or "working tree".
If you've ever used git commands like git status or git add, then, these won't work in a git bare repository, because a git bare repository has no working tree.
Looking at the differences
As a quick example, let's create two folders named git-normal and git-bare:
1mkdir git-normal git-bare
First, let's change directory to the git-normal folder and create a normal git repo:
1cd git-normal/
2git init .
3ls -la
We can see what a normal git repo looks like:
1git-normal on main
2Permissions Size User Date Modified Name
3drwxr-xr-x - supa 5 Aug 03:09 .
4drwx------ - supa 5 Aug 03:10 ..
5drwxr-xr-x - supa 5 Aug 03:09 .git
Notice the .git folder? Let's see what's in there:
1cd .git/
2ls -la
1~/git-normal/.git
2Permissions Size User Date Modified Name
3drwxr-xr-x - supa 5 Aug 03:26 .
4drwxr-xr-x - supa 5 Aug 03:09 ..
5drwxr-xr-x - supa 5 Aug 03:09 branches
6drwxr-xr-x - supa 5 Aug 03:09 hooks
7drwxr-xr-x - supa 5 Aug 03:09 info
8drwxr-xr-x - supa 5 Aug 03:09 objects
9drwxr-xr-x - supa 5 Aug 03:09 refs
10.rw-r--r-- 92 supa 5 Aug 03:09 config
11.rw-r--r-- 73 supa 5 Aug 03:09 description
12.rw-r--r-- 21 supa 5 Aug 03:09 HEAD
Notice the files and folder names in the normal .git folder? These are keeping track of the changes to your files in your working tree.
Now, let's go to the git-bare folder we created:
1cd ../../git-bare
and create a git bare repo:
1git init --bare .
2ls -la
1~/git-bare
2Permissions Size User Date Modified Name
3drwxr-xr-x - supa 5 Aug 03:18 .
4drwx------ - supa 5 Aug 03:18 ..
5drwxr-xr-x - supa 5 Aug 03:18 branches
6drwxr-xr-x - supa 5 Aug 03:18 hooks
7drwxr-xr-x - supa 5 Aug 03:18 info
8drwxr-xr-x - supa 5 Aug 03:18 objects
9drwxr-xr-x - supa 5 Aug 03:18 refs
10.rw-r--r-- 66 supa 5 Aug 03:18 config
11.rw-r--r-- 73 supa 5 Aug 03:18 description
12.rw-r--r-- 21 supa 5 Aug 03:18 HEAD
Notice how a git bare repository contains all the files which you would normally find in the .git folder of a normal git repository?
Why do I need to know this?
A git bare repository can be used to add, push, and pull file changes from another repository. So, in a sense, we can make our $HOME folder the working tree, and use the git bare repository to track the file changes in $HOME. We can track specific files - our dotfiles for example, and ignore the rest. We can then push those changes to a remote git forge, like GitLab or GitHub, then pull those changes in from another computer, so they can be used.

I'm sold! How do I set this up?
Well, firstly, you'll need to have a basic understanding of how to use git. I suggest you read the documentation, then return here before carrying on, so you understand the basics of how git works and what we are doing.
Up to speed? Cool! Let's carry on...
Create a git bare repository
First, create a git bare repository to manage your dotfiles in your $HOME folder:
1git init --bare $HOME/.dotfiles
Create an alias
Next, we need to add an alias for the command we need to use to manage the dotfiles. This alias tells git that our working tree is going to be our $HOME folder. Going forward, any time we need to manage the dotfiles, we'll be using this alias rather than the regular git command.
You only need to do this once for whatever is your default shell:
For Zsh users:
1echo "alias config='/usr/bin/git --git-dir=$HOME/.dotfiles/ --work-tree=$HOME'" >> $HOME/.zshrc
For Bash users:
1echo "alias config='/usr/bin/git --git-dir=$HOME/.dotfiles/ --work-tree=$HOME'" >> $HOME/.bashrc
With the alias set, let's reload the shell:
For Zsh:
1source ~/.zshrc
For Bash:
1source ~/.bashrc
Hide Untracked Files
Every time we add files to track, we don't want to see a list of all the untracked files in $HOME in the git status output, so we issue this command to suppress that.
You only need to do this once:
1config config --local status.showUntrackedFiles no
IMPORTANT
Each time you need to manage a file, you need to use the new config alias, not the usual git command.
Example:
| Action | Command |
|---|---|
| To stage a file | config add path/to/file.conf |
| To stage previously added files | config add -u |
| Commit a file and add a comment | config commit -m "I edited something" |
| View files that have changes | config status |
| Push local changes to a remote repository | config push |
Example Usage
Now that everything is set up, we can use the config alias to add files to track:
1config add .Xresources
2config commit -m "Added .Xresources file"
3config push
Maybe you wish to track changes to your .zshrc file:
1config add .zshrc
2config commit -m "I added my .zshrc file"
3config push
Let's say you made edits to both your .Xresources and .zshrc file which you added earlier. You can view, stage and push the changes to those files with:
1config status
2config add -u
3config commit -m "I updated a bunch of files!"
4config push
Maybe you made changes to your favourite terminal emulator configs, and have a bunch of files that you want to add all in one go:
1config add .config/kitty/*
2config commit -m "Adding all my kitty settings, sessions and themes"
3config status
4config push
What NOT to add
Obviously it goes without saying, that there are a lot of private files which you don't want to add to a public remote repository. It's important to inspect the contents of any files you wish to add.
Files and folders NOT TO ADD:
- Don't add your
.sshfolder. - Don't add files containing your home address, passwords or ip address.
- Don't add your web browser or email folder.
- Never add any file which contain personal information (Files that you wouldn't want to print out, duct tape to your forehead and walk around in public with!).
You get the idea.
For an example of which files and folder to add, take a look at my dotfiles on my GitLab.
Clone changes on another PC
On your other pc, you can clone the changes you made previously.
First, ensure that on the other pc, that you have installed git, and you've set the same config alias you defined earlier:
1echo "alias config='/usr/bin/git --git-dir=$HOME/.dotfiles/ --work-tree=$HOME'" >> $HOME/.zshrc
Once this is added, reload your shell:
1source ~/.zshrc
Then, clone the remote repository to your new machine (obviously, edit the URL to point to your own remote repository):
1git clone --bare git@gitlab.com:supashang/dotfiles.git $HOME/.dotfiles
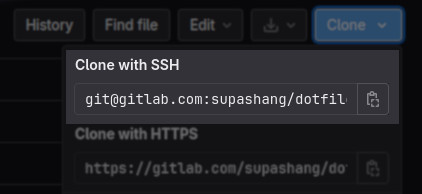
Always ensure to clone your dotfiles using the ssh URL rather than https, otherwise you'll have to manually provide your username and password each time you wish to push to the remote repository at a later date.
To update the files in the working tree (the $HOME folder on your new machine), use the checkout command:
1config checkout
Conclusion
Using a git bare repository is an excellent way to manage your dotfiles. I've used this method for a few years now, to move settings from my main pc to my Raspberry Pi, and to share my system configuration with friends. It makes life a lot simpler than having to run back and forth with USB sticks to different machines, copying and pasting settings into chat programs, having to manually locate and edit files, or, worse, having to use symbolic links all over the $HOME folder pointing to files.
Obviously, this method is no substitute for a routine backup of your entire $HOME folder to an external device, but for quickly transferring application settings to different machines or to other people, it's very convenient.
